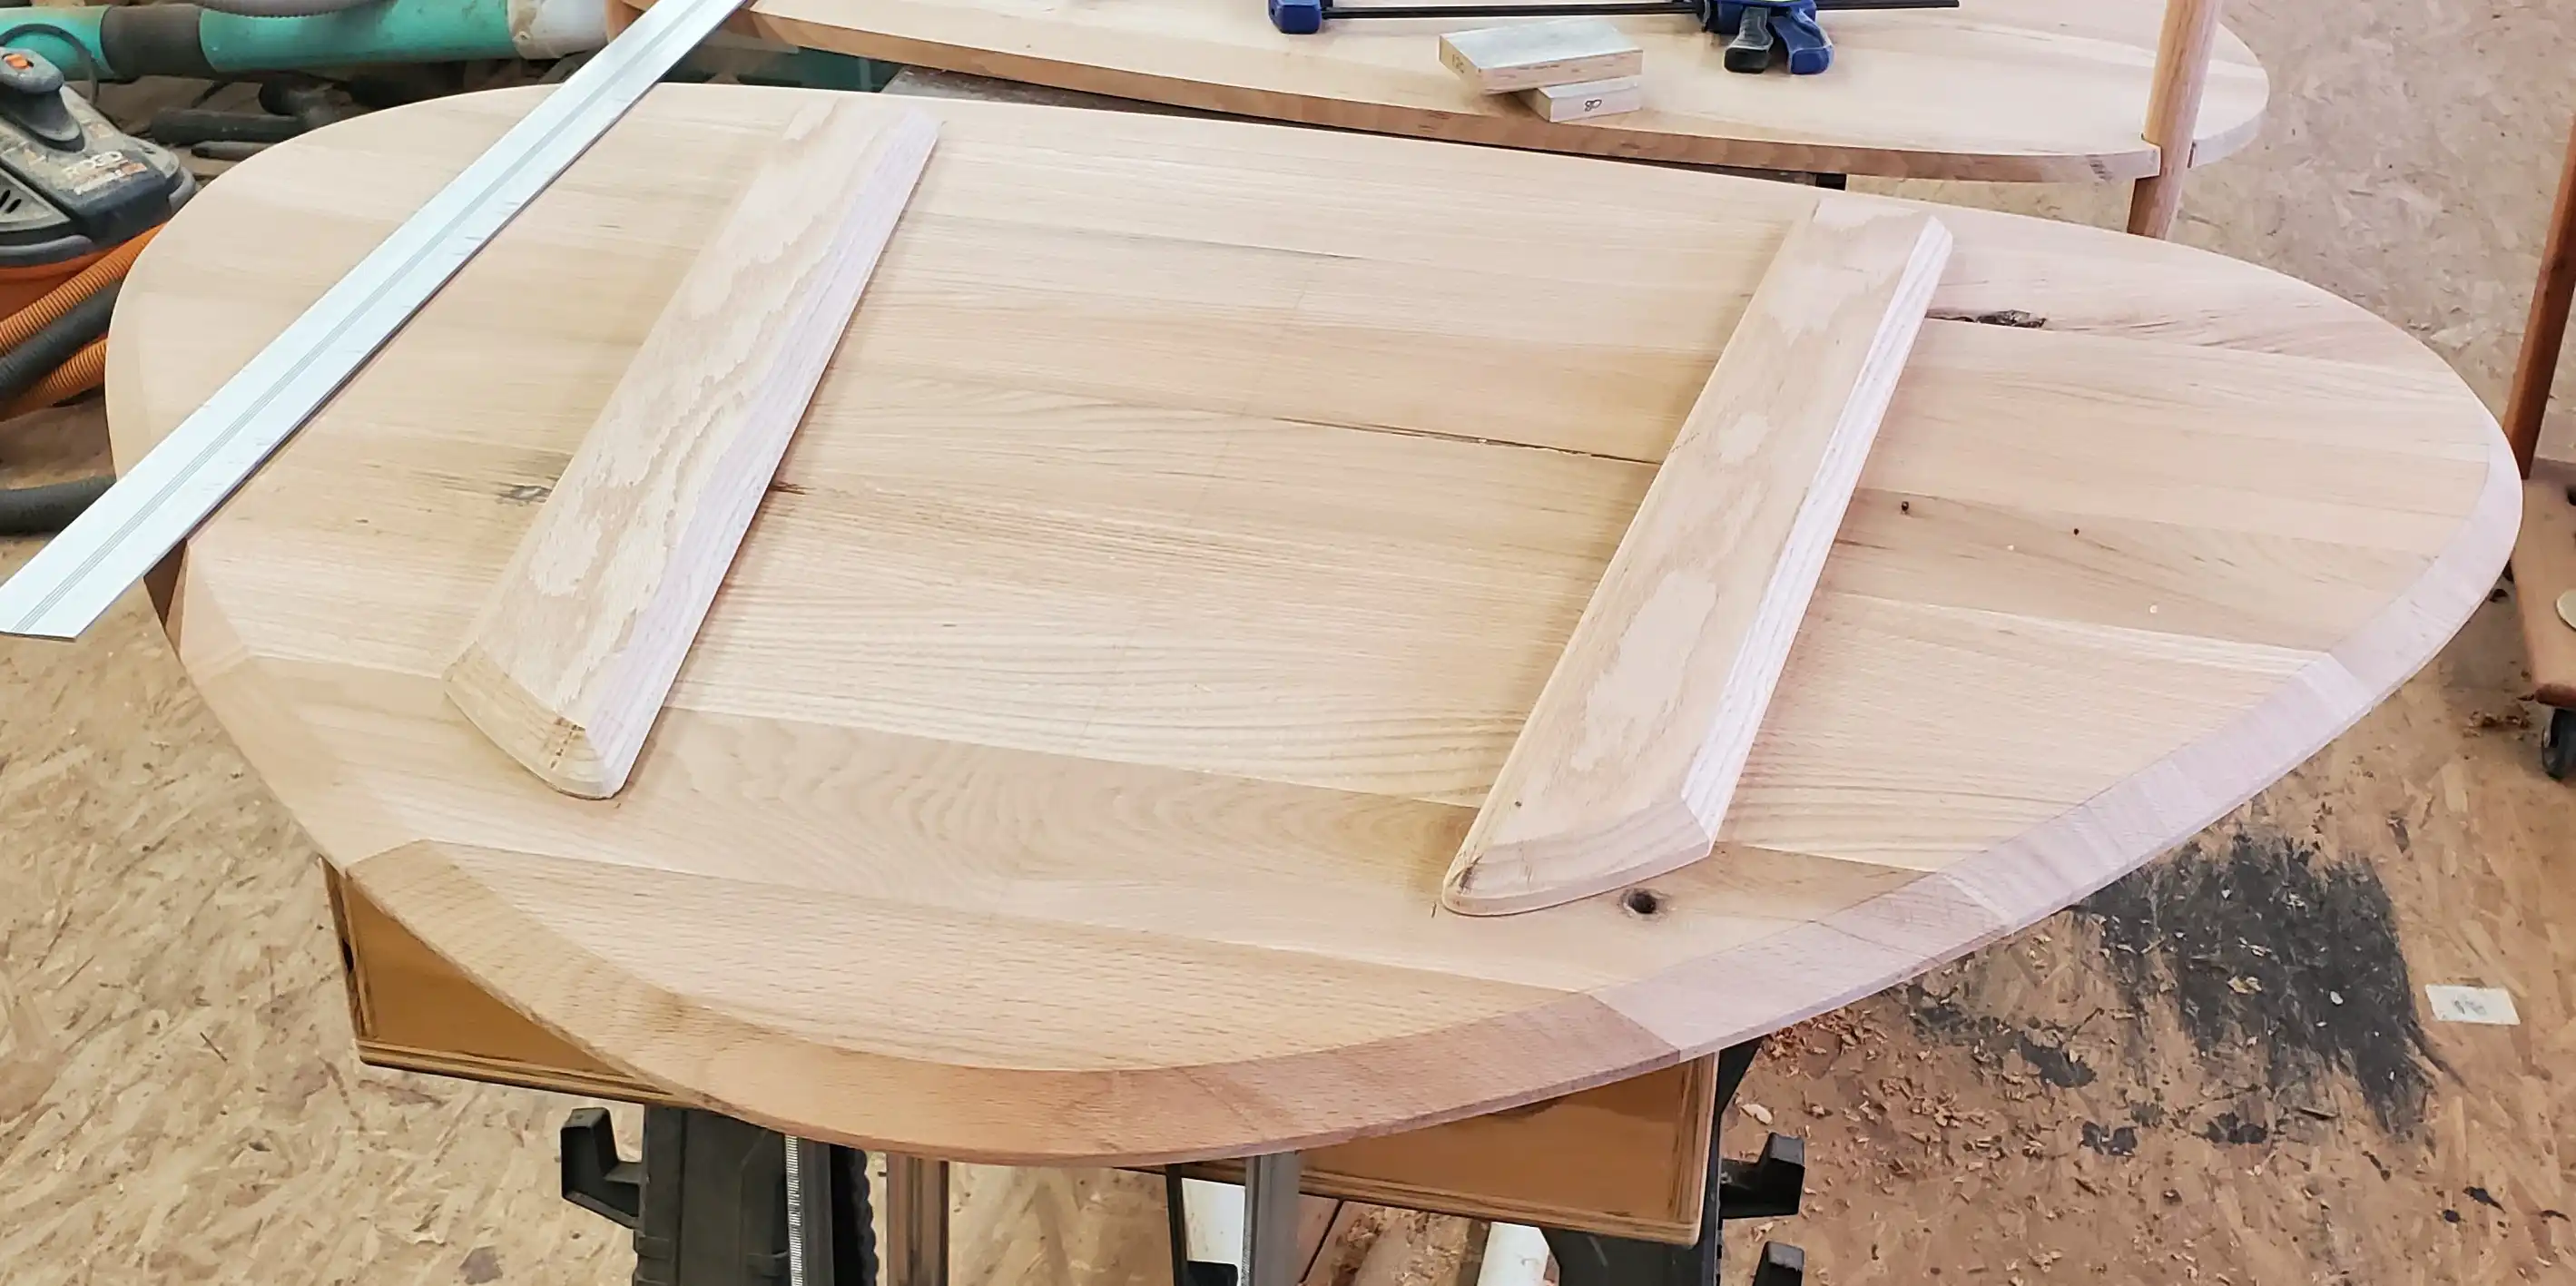
In this final update, we will run through the various steps to bring this table project to a close. All the major components have been cut to size and shaped, but now we have a number of small details to wrap up. We start first on the underside of the top. Solid wood panels can move with changes to temperature and humidity. Not only does it change dimensions (in fact your table top may change upwards of 1/8" in width or so over the various seasons), it can take on some warps or cups creating a wavy surface. This is highly dependent on the quality of the material and its moisture content. This is actually one of the primary reasons to kiln dry hardwood.
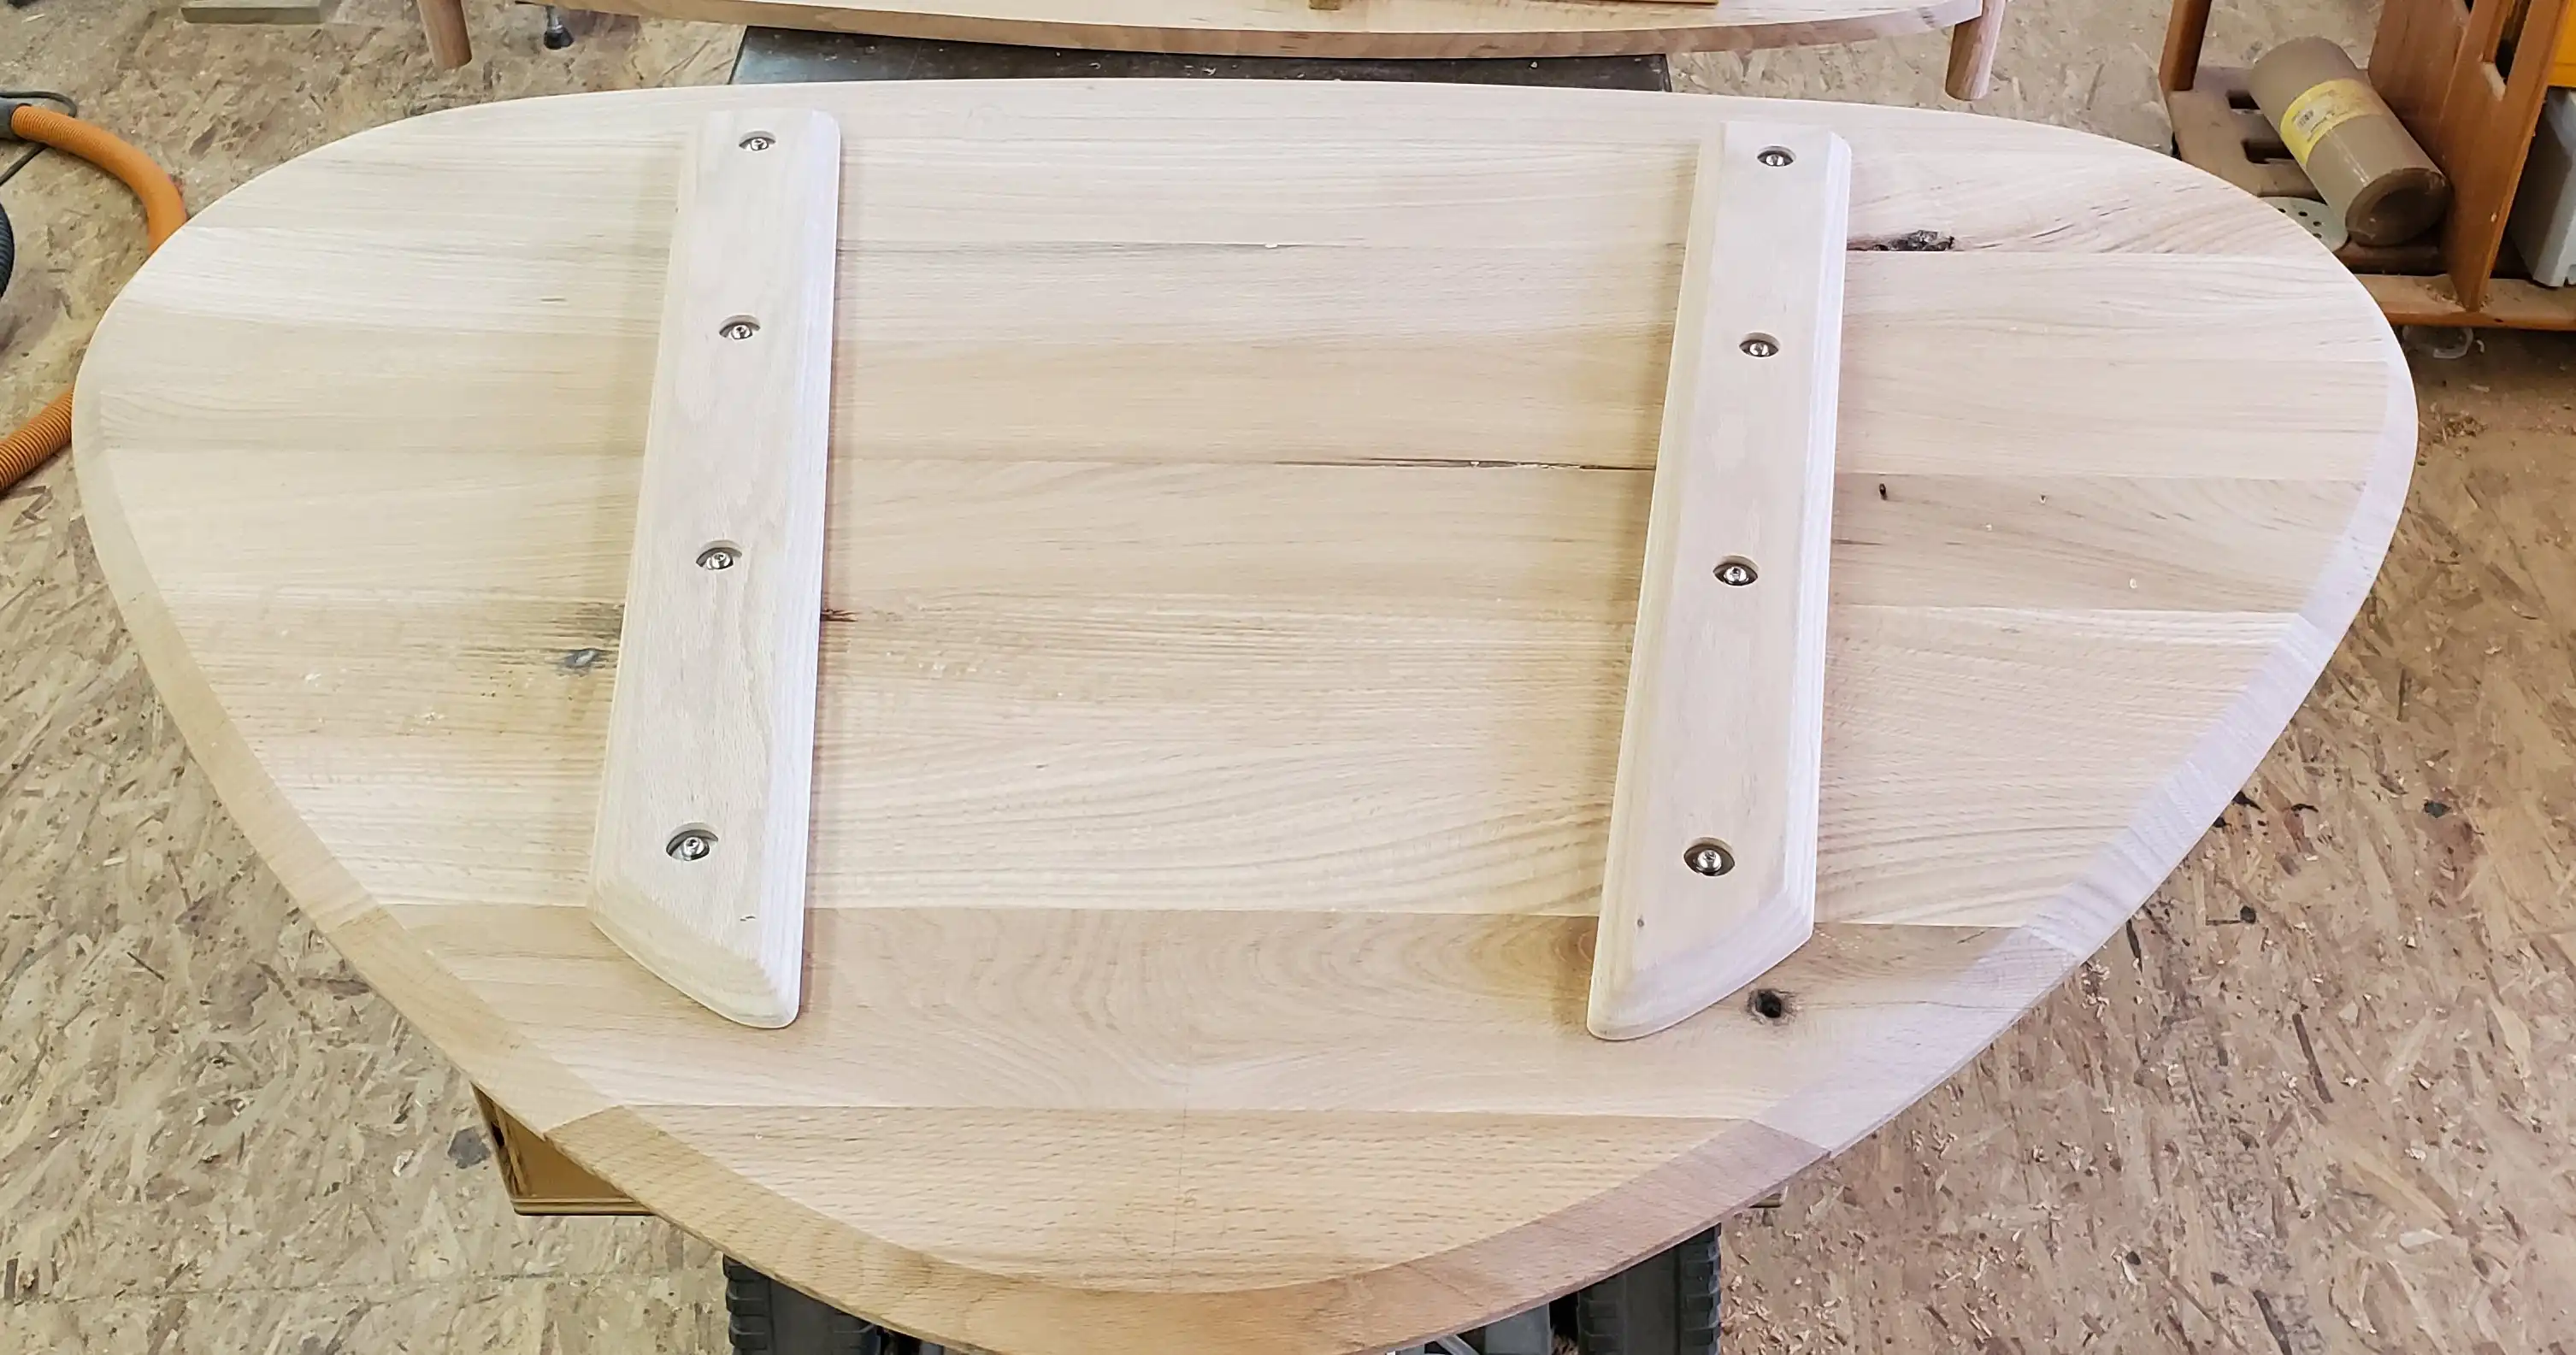
While I don’t suspect we will have any major warping or movement issues with this piece, I tend to take a “belt-and-suspenders” approach, especially when sending pieces to entirely different climates across the country! On the underside of the table top, I cut out some supports that will get screwed to help hold the panel flat over time. The edges were beveled and sized to prevent these pieces from being seen until you squat down or bend over near the table.
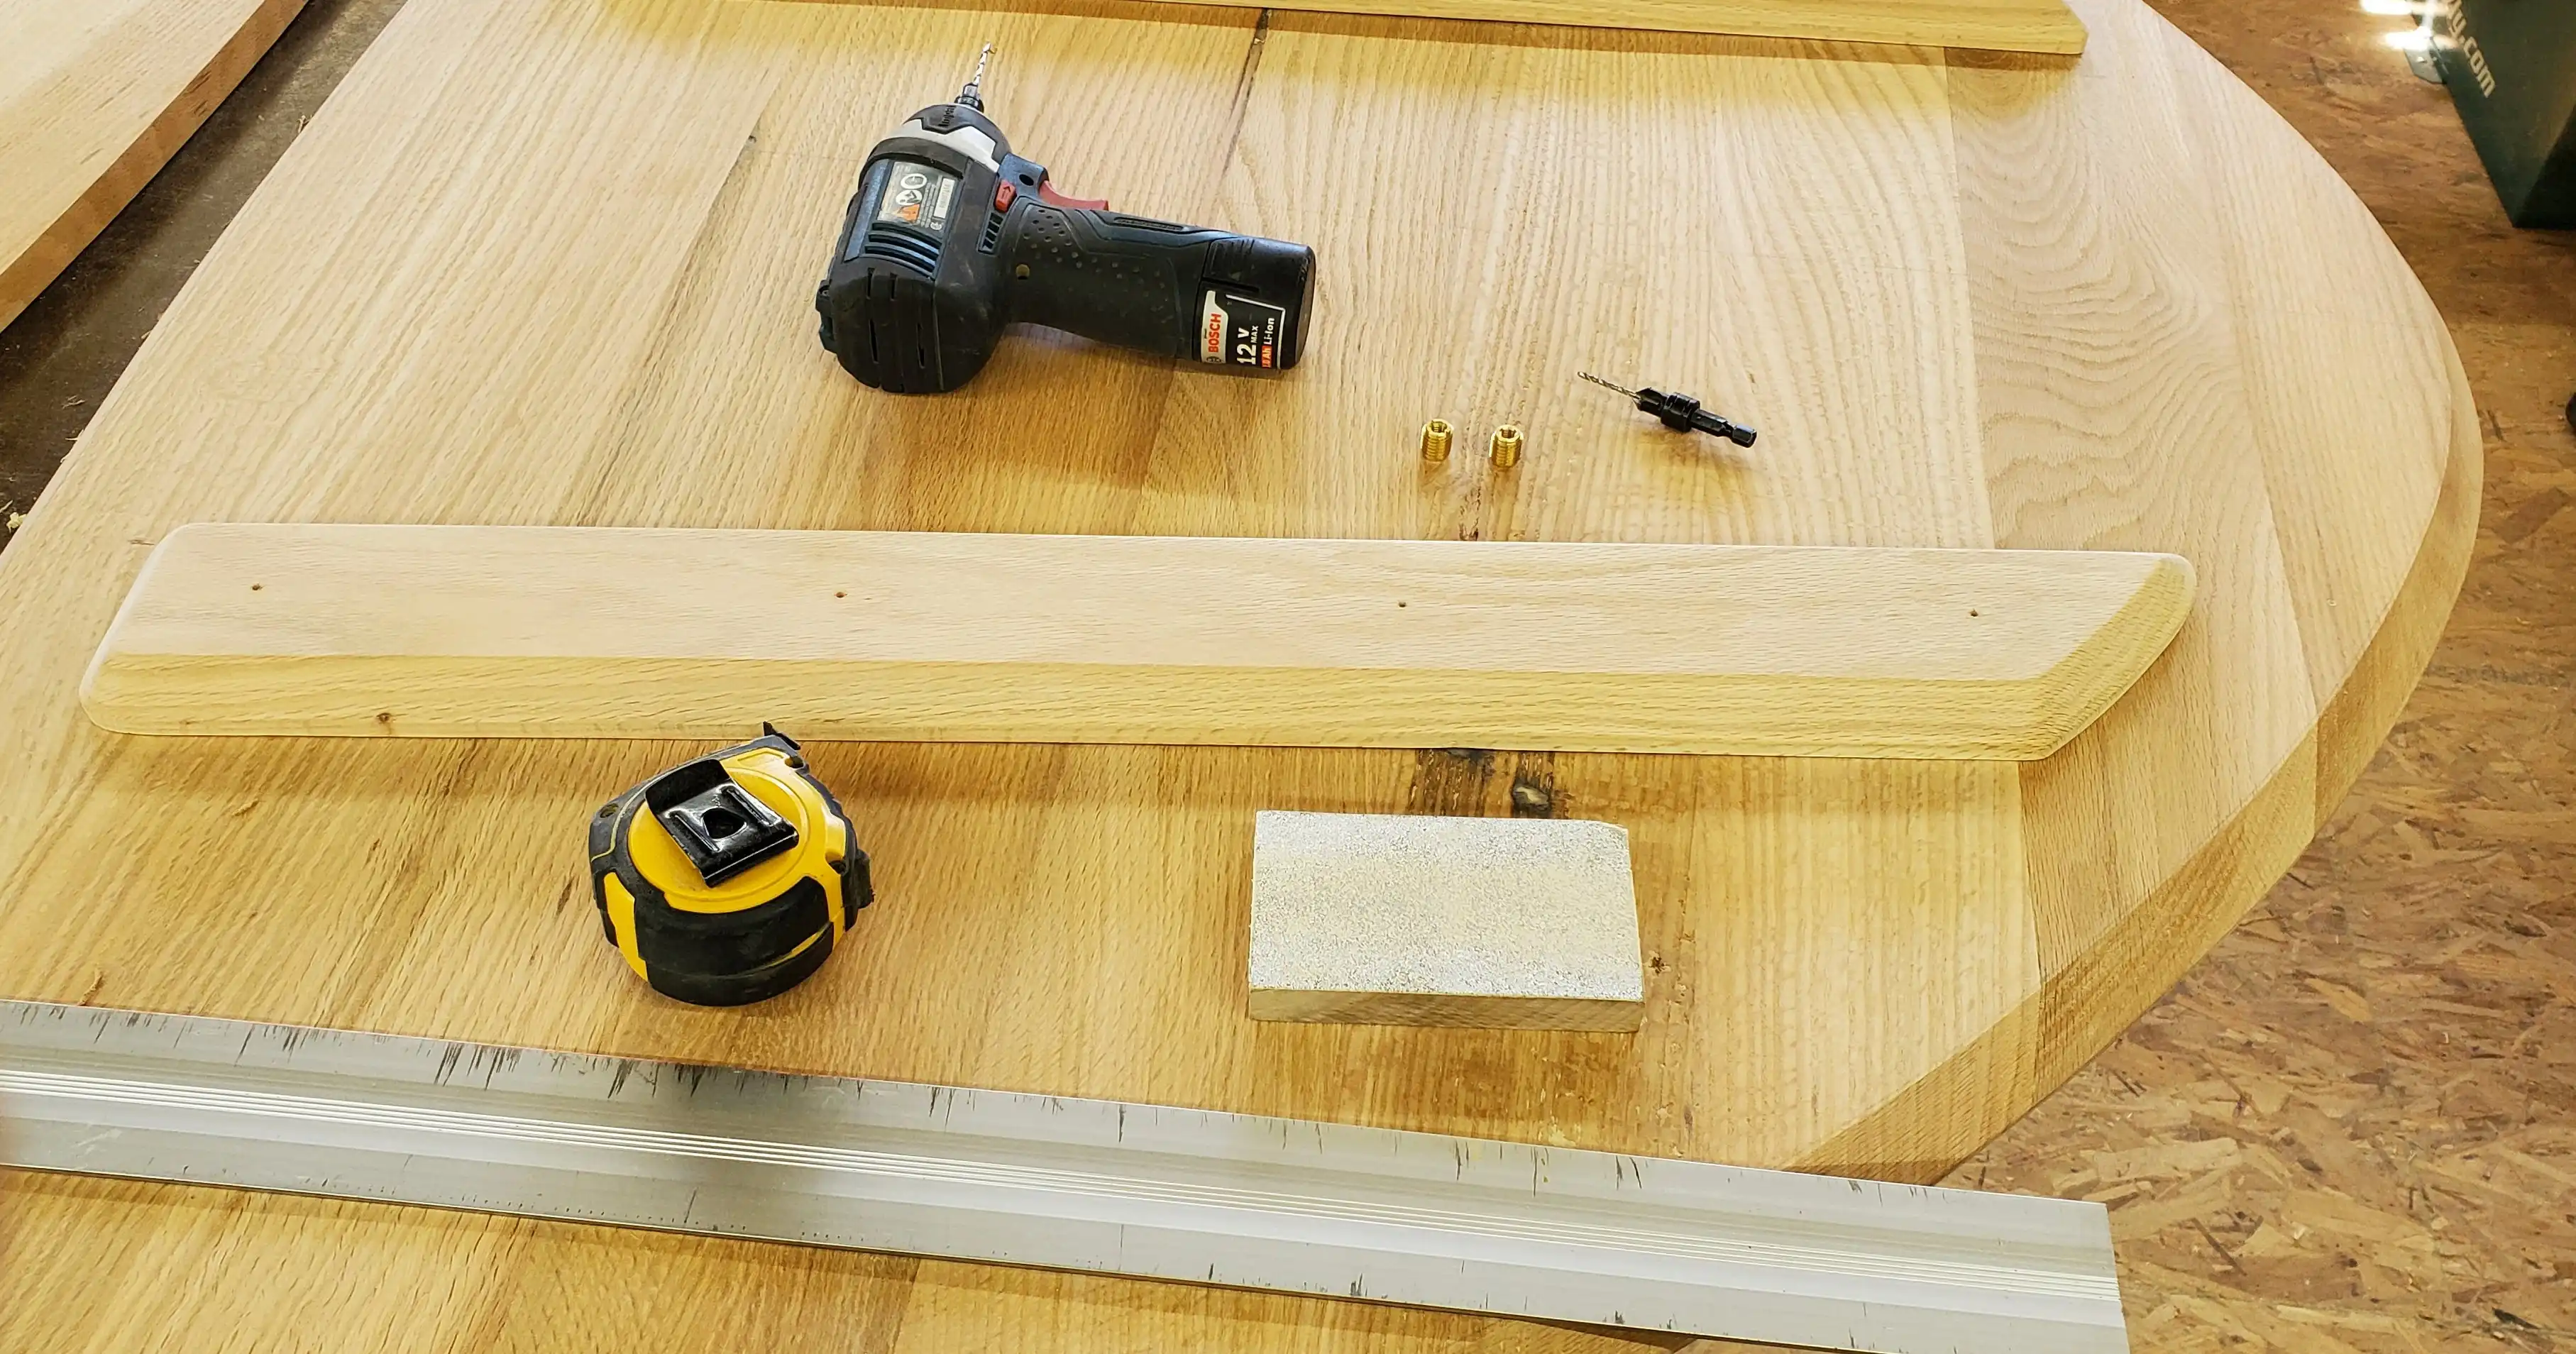
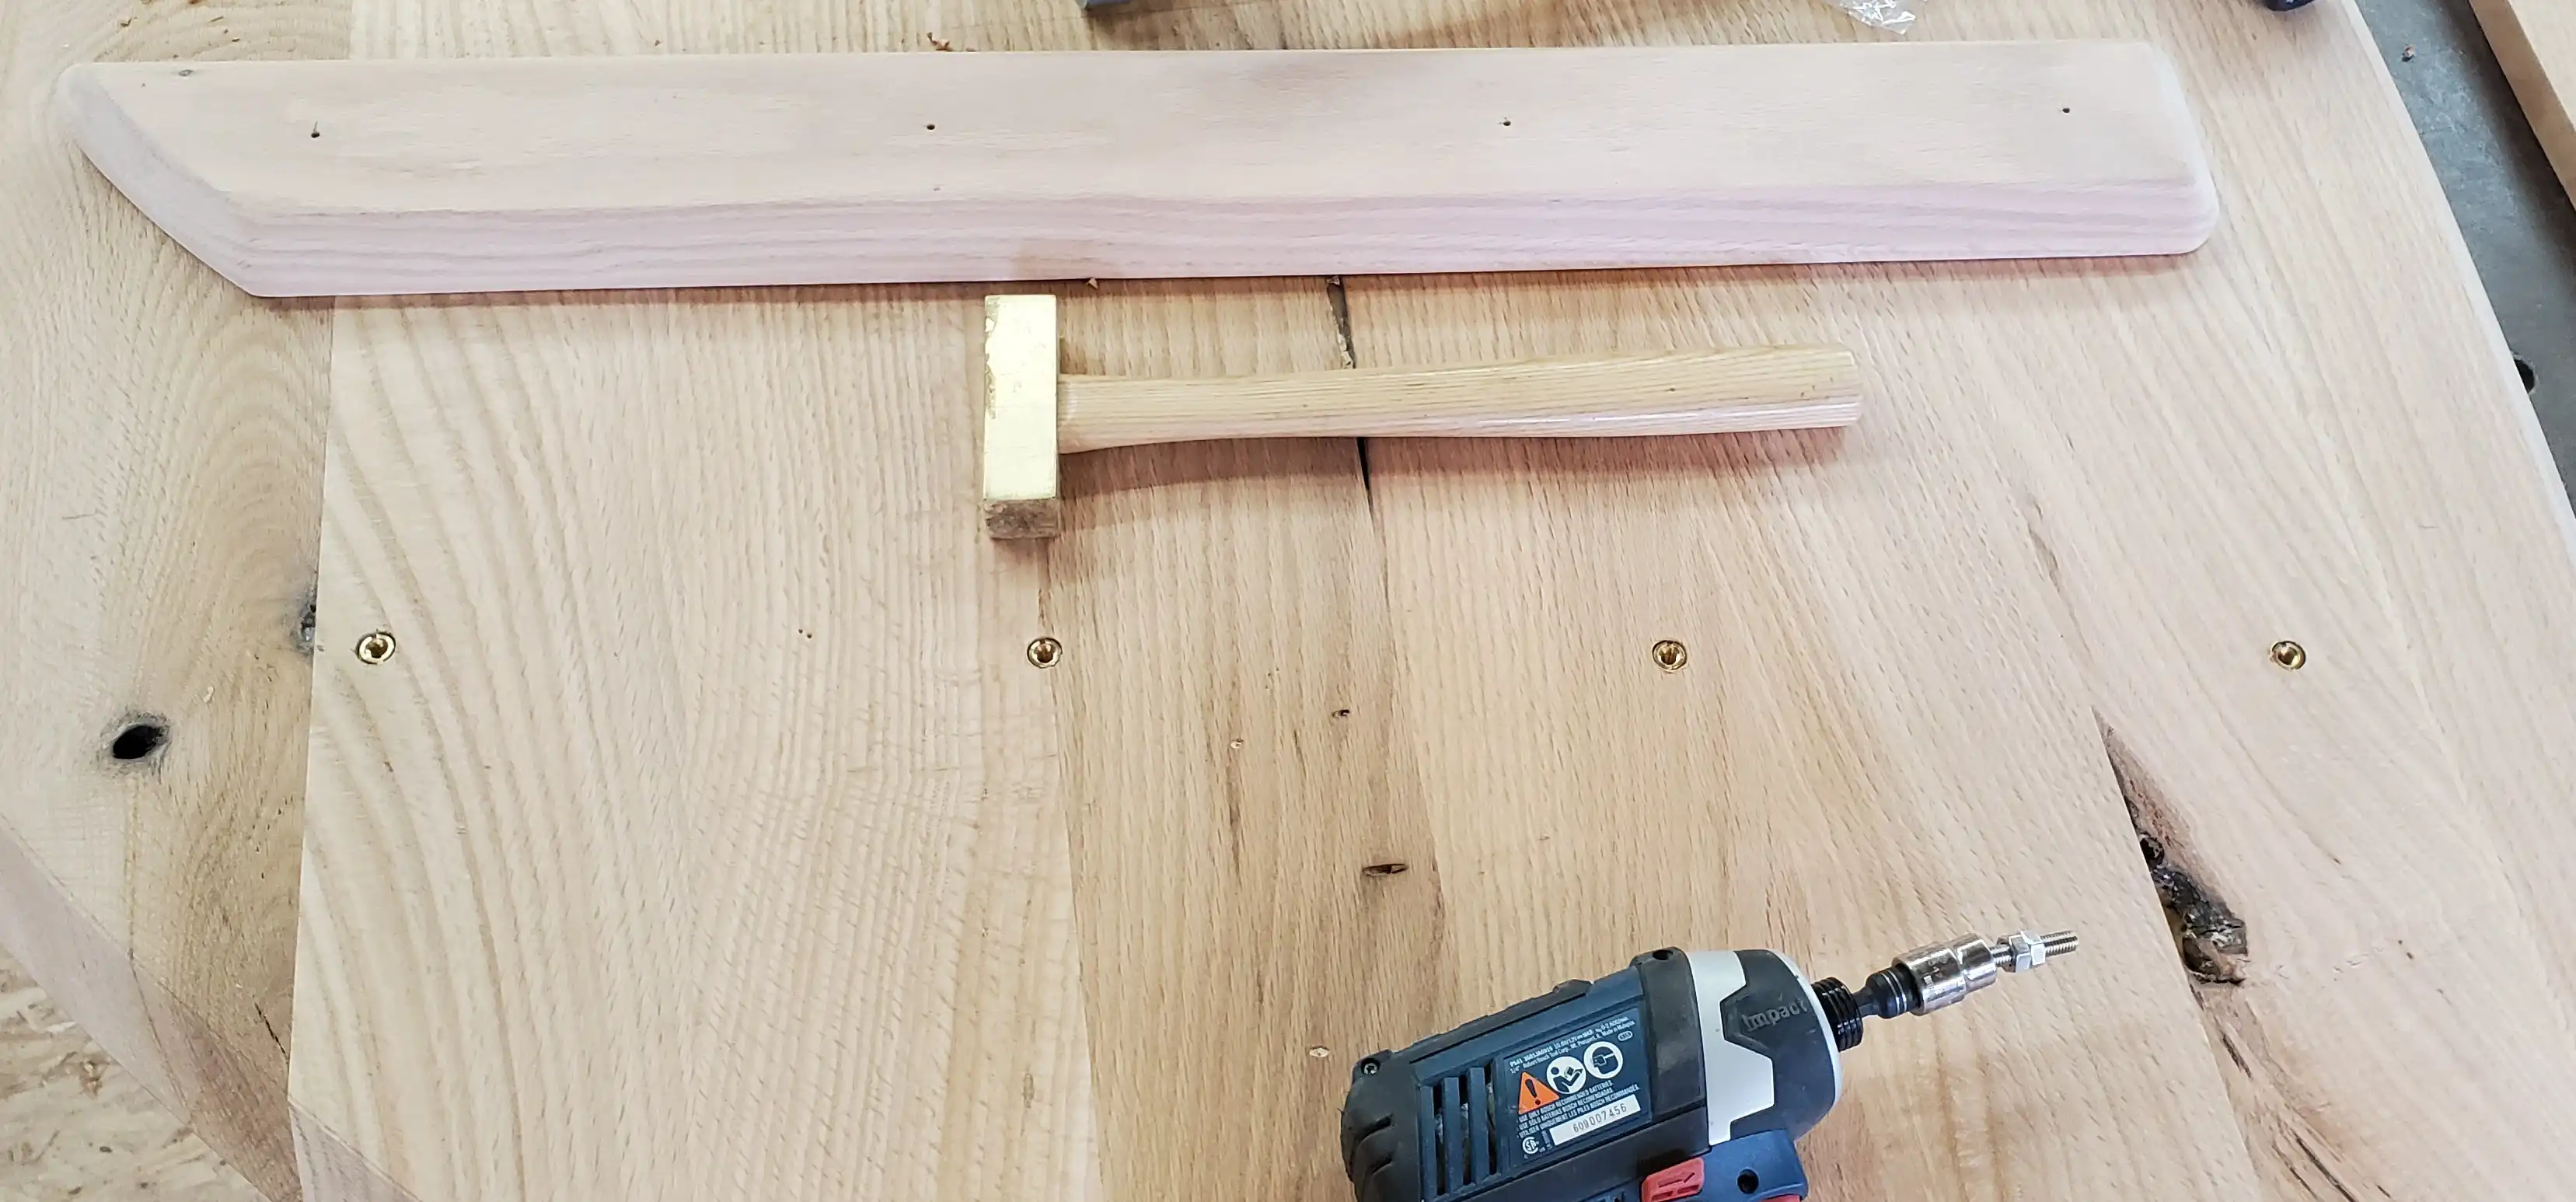
To fasten these pieces to the underside of the top, the strongest method is to use stainless steel bolts fitted into threaded brass inserts. Pictured below is the initial layout of the inserts and holes to be drilled into the supports. The holes in the supports are drilled oversize to allow the table top to expand and contract across its width as needed. Washers under the bolts help hide these gaps.
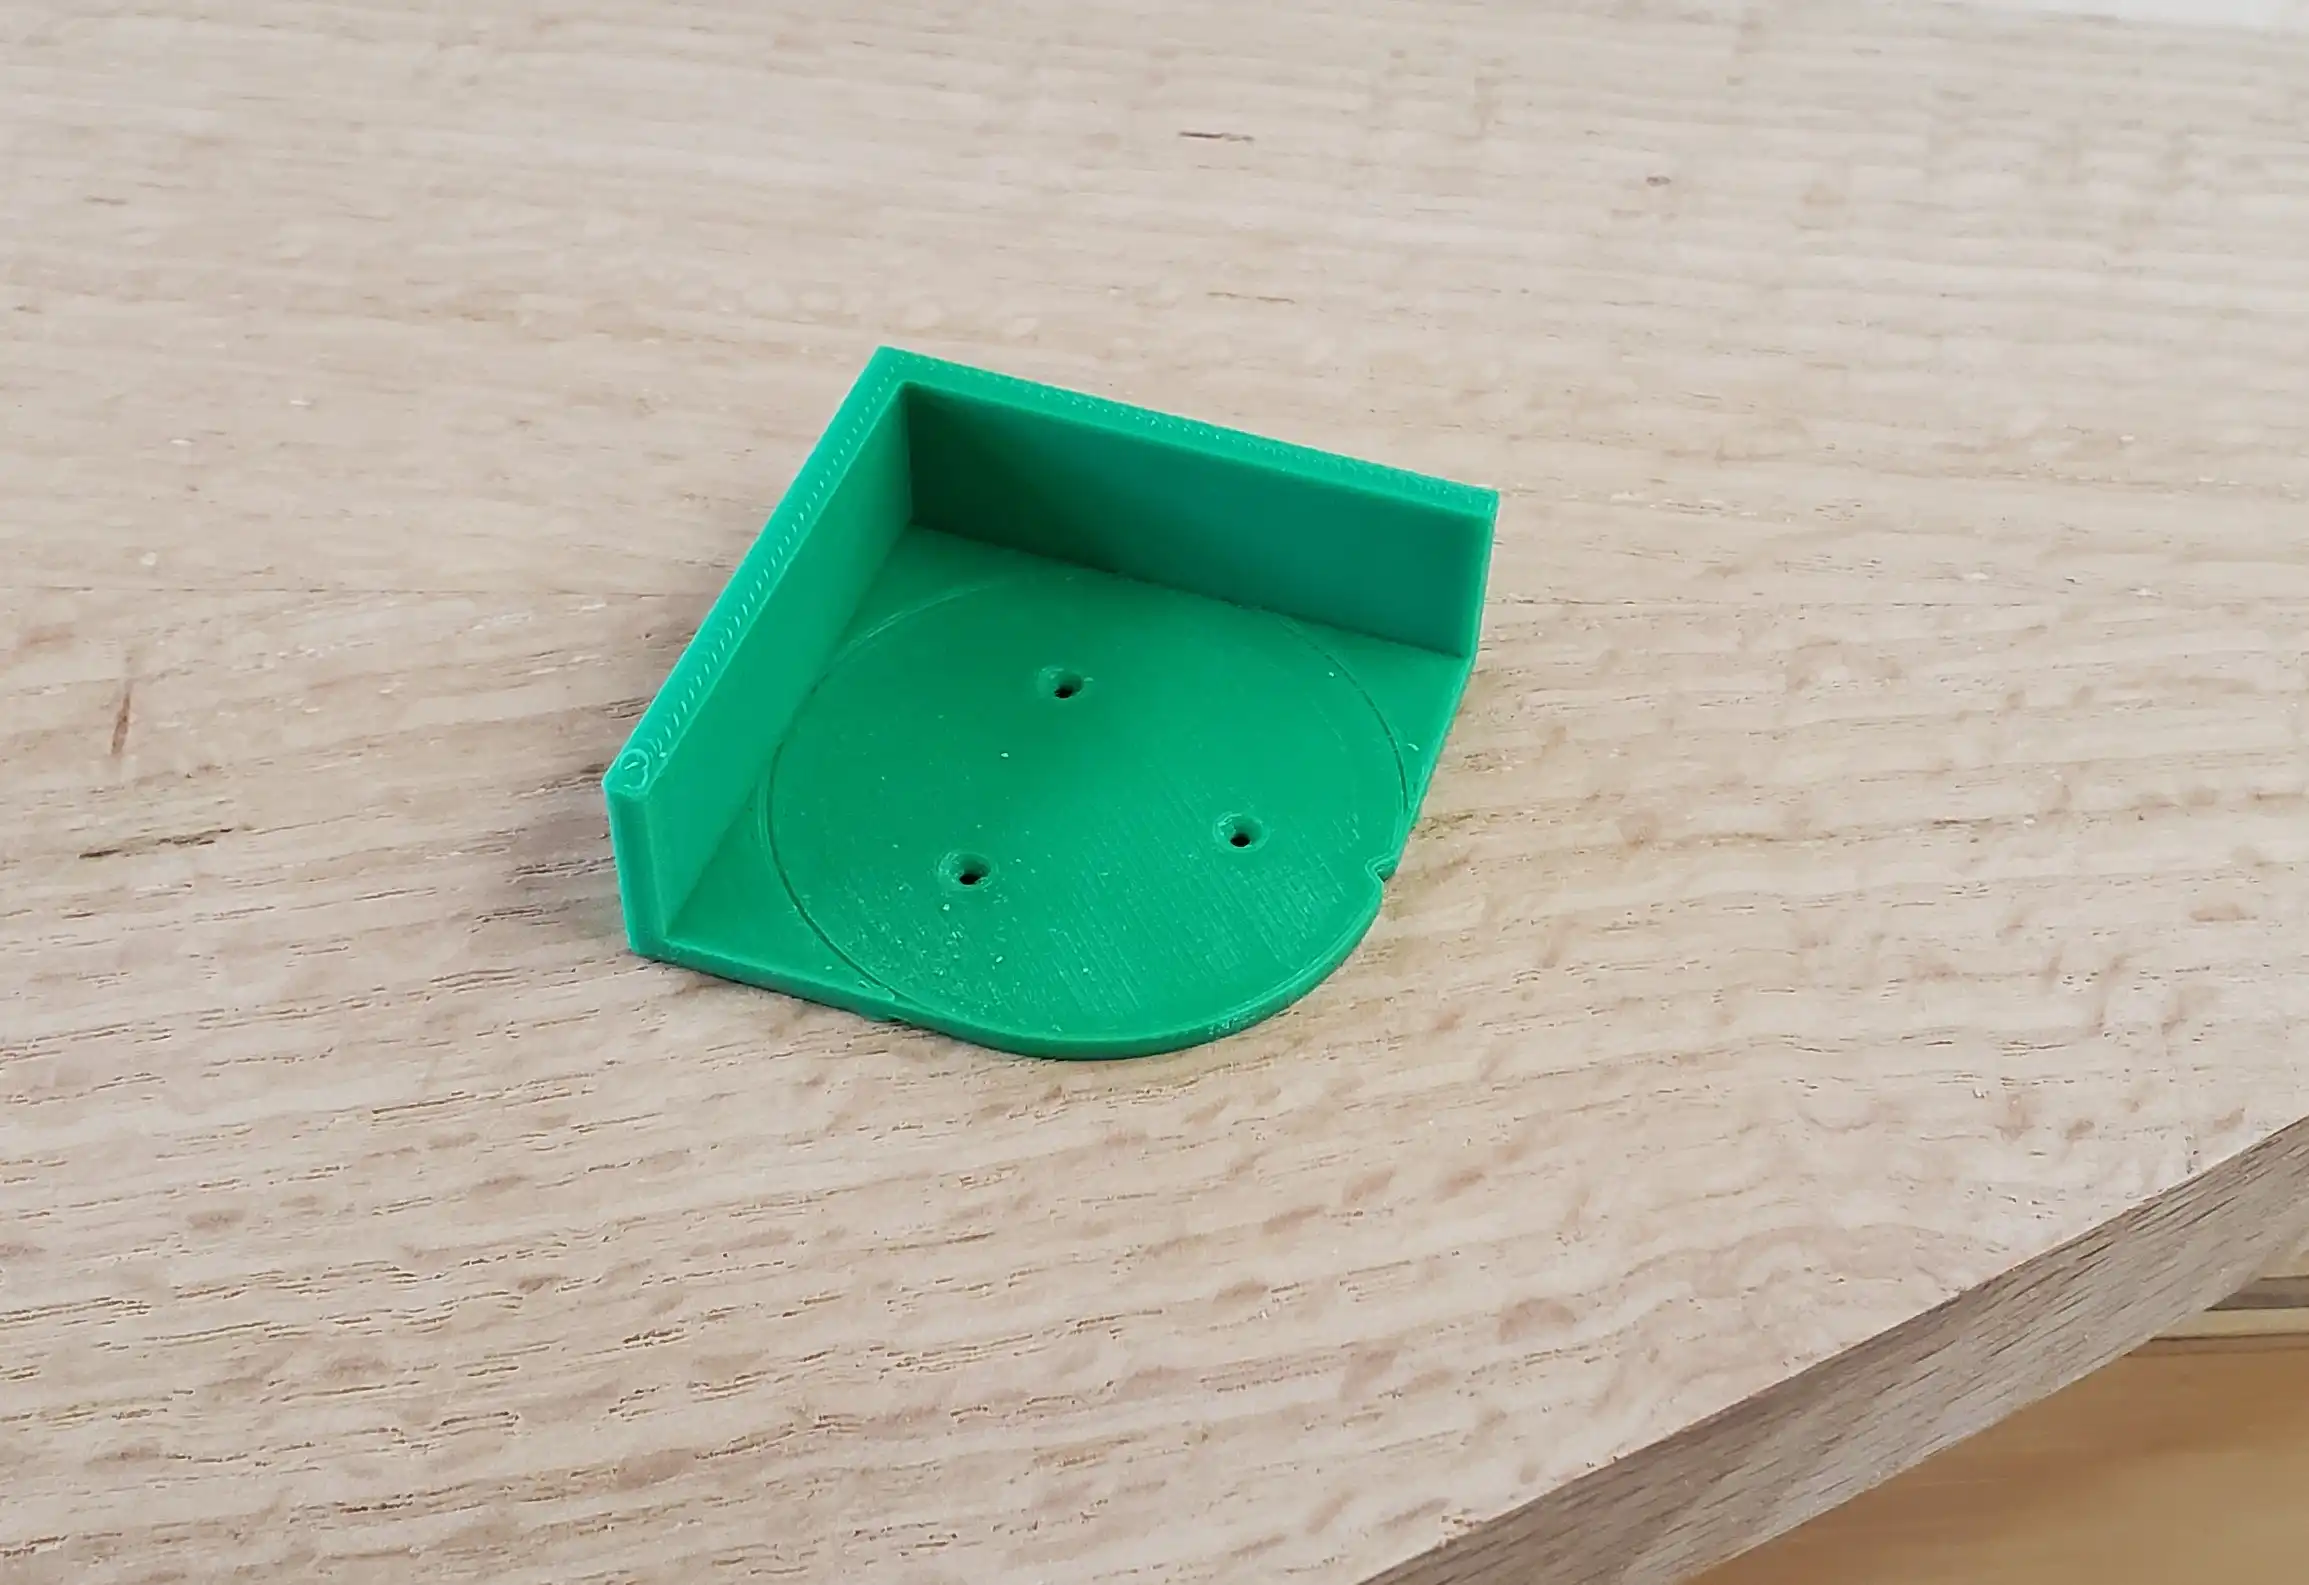
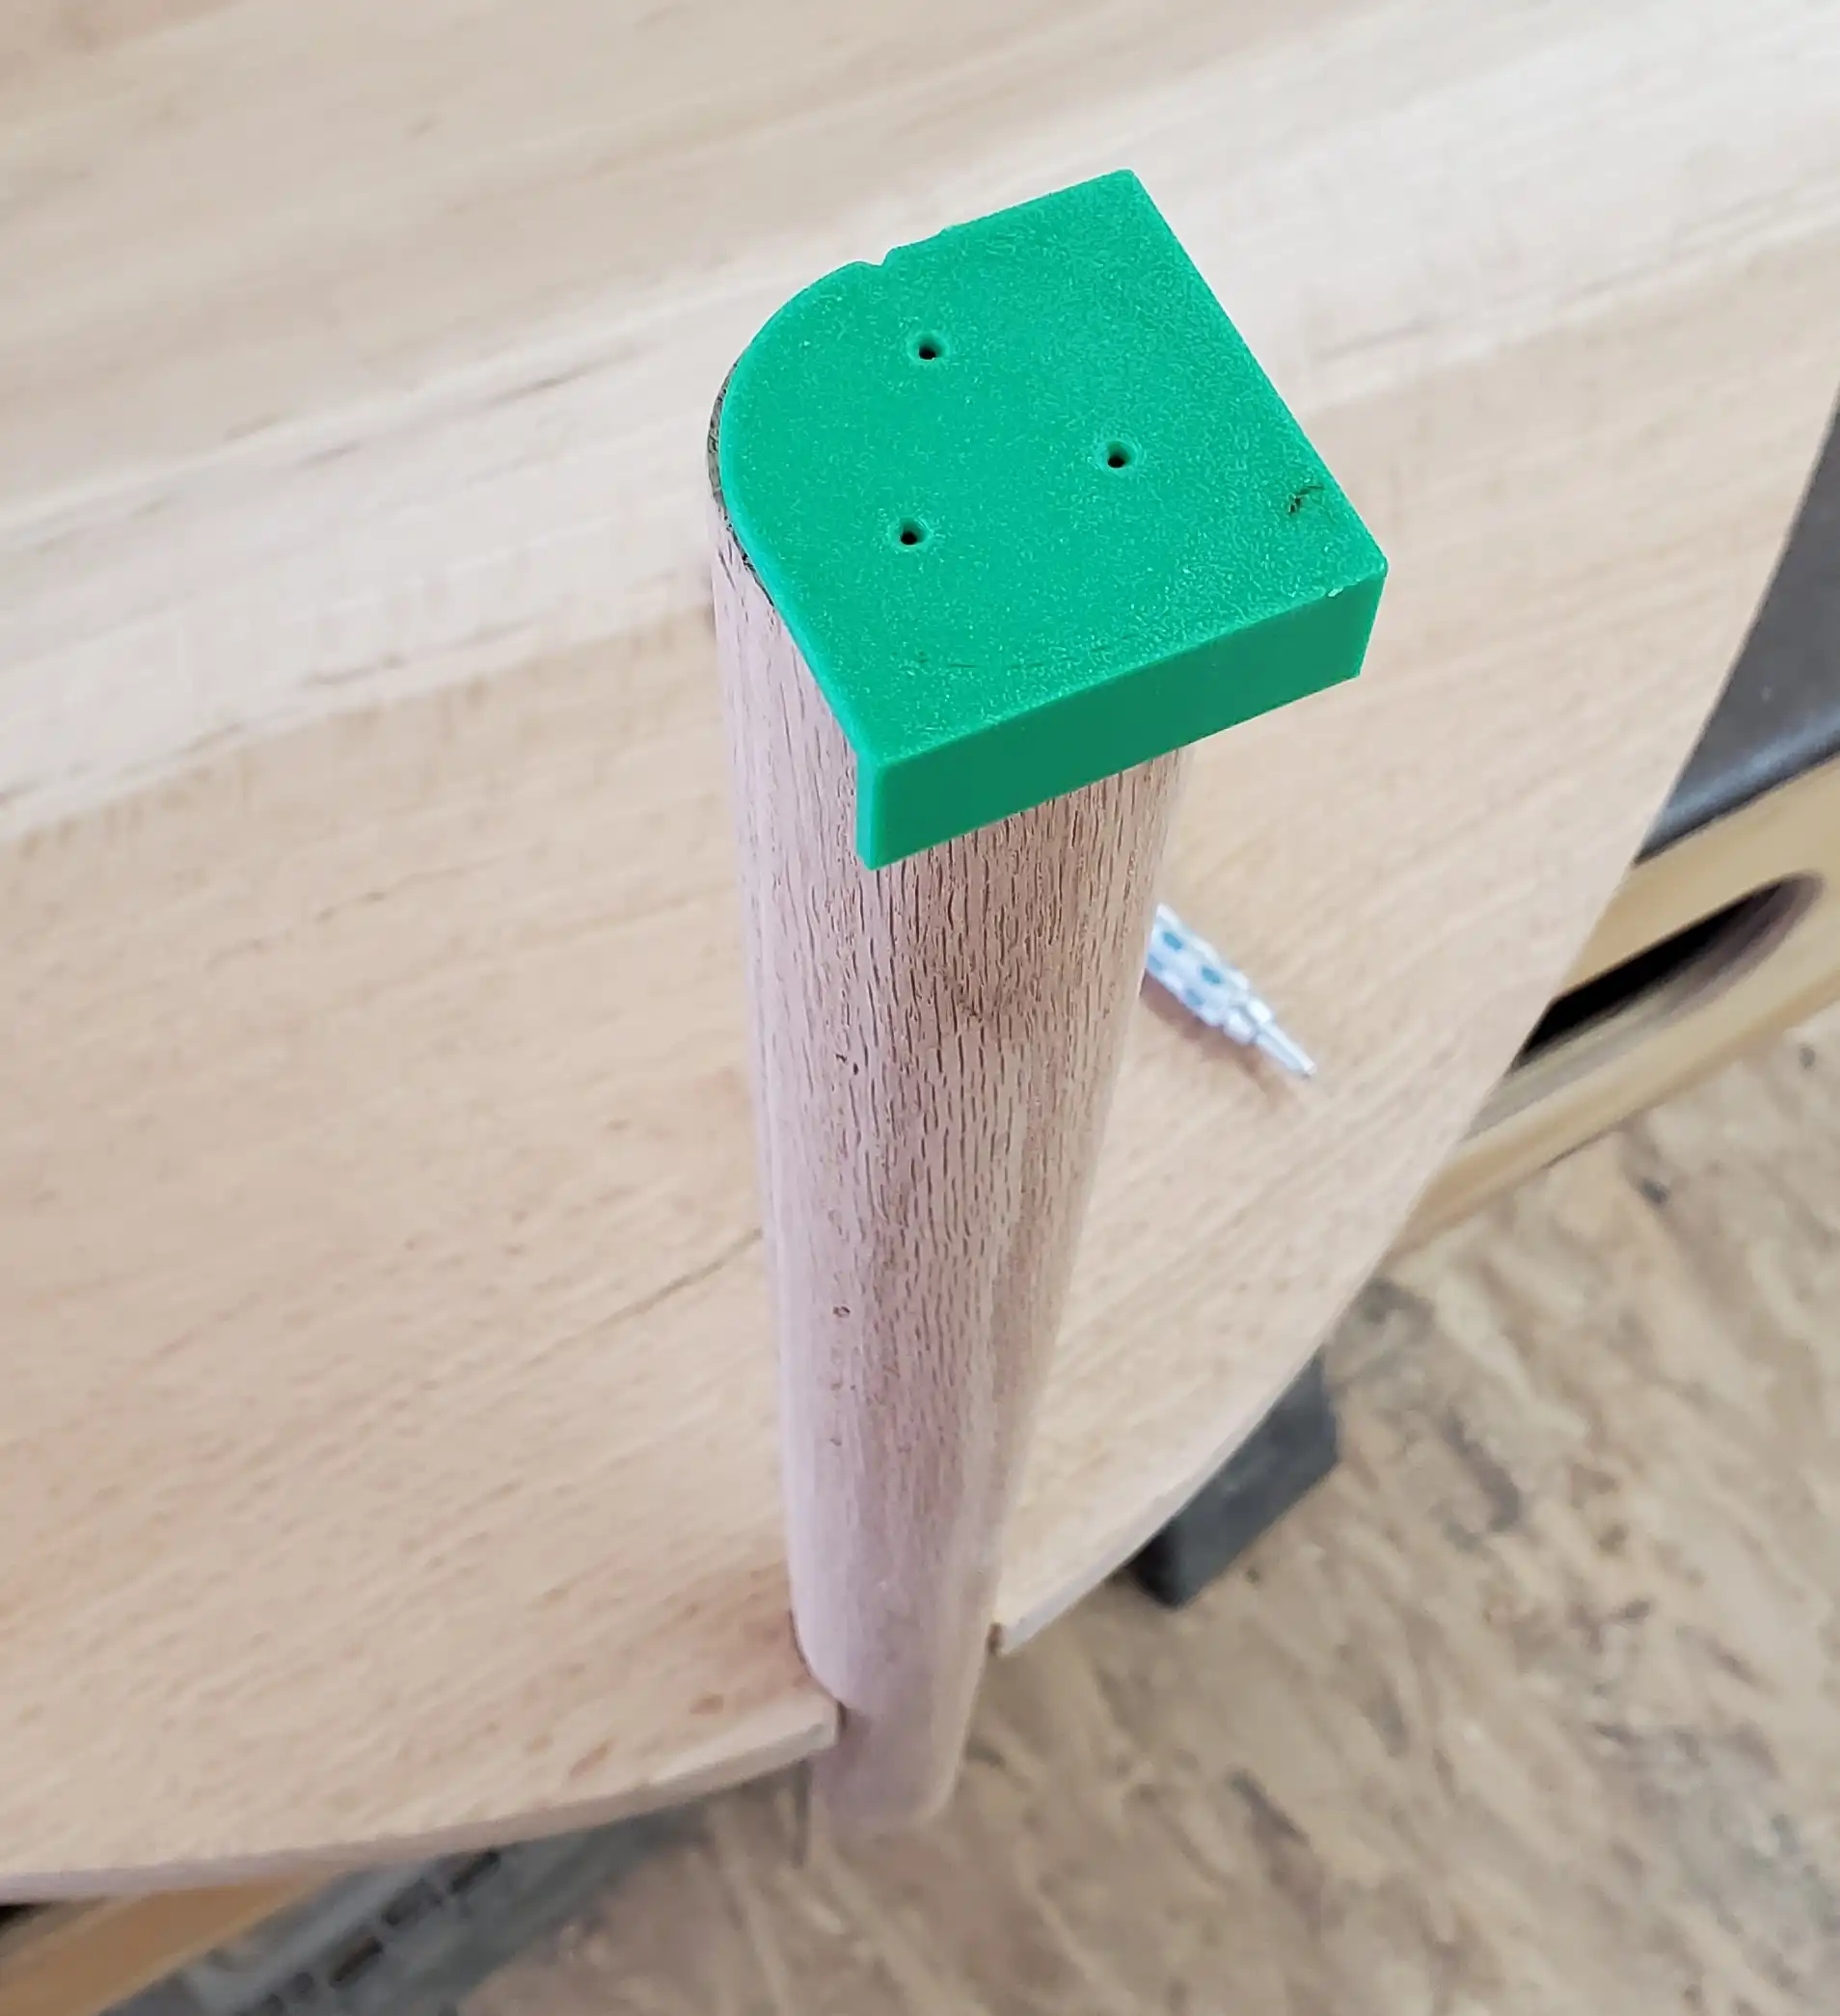
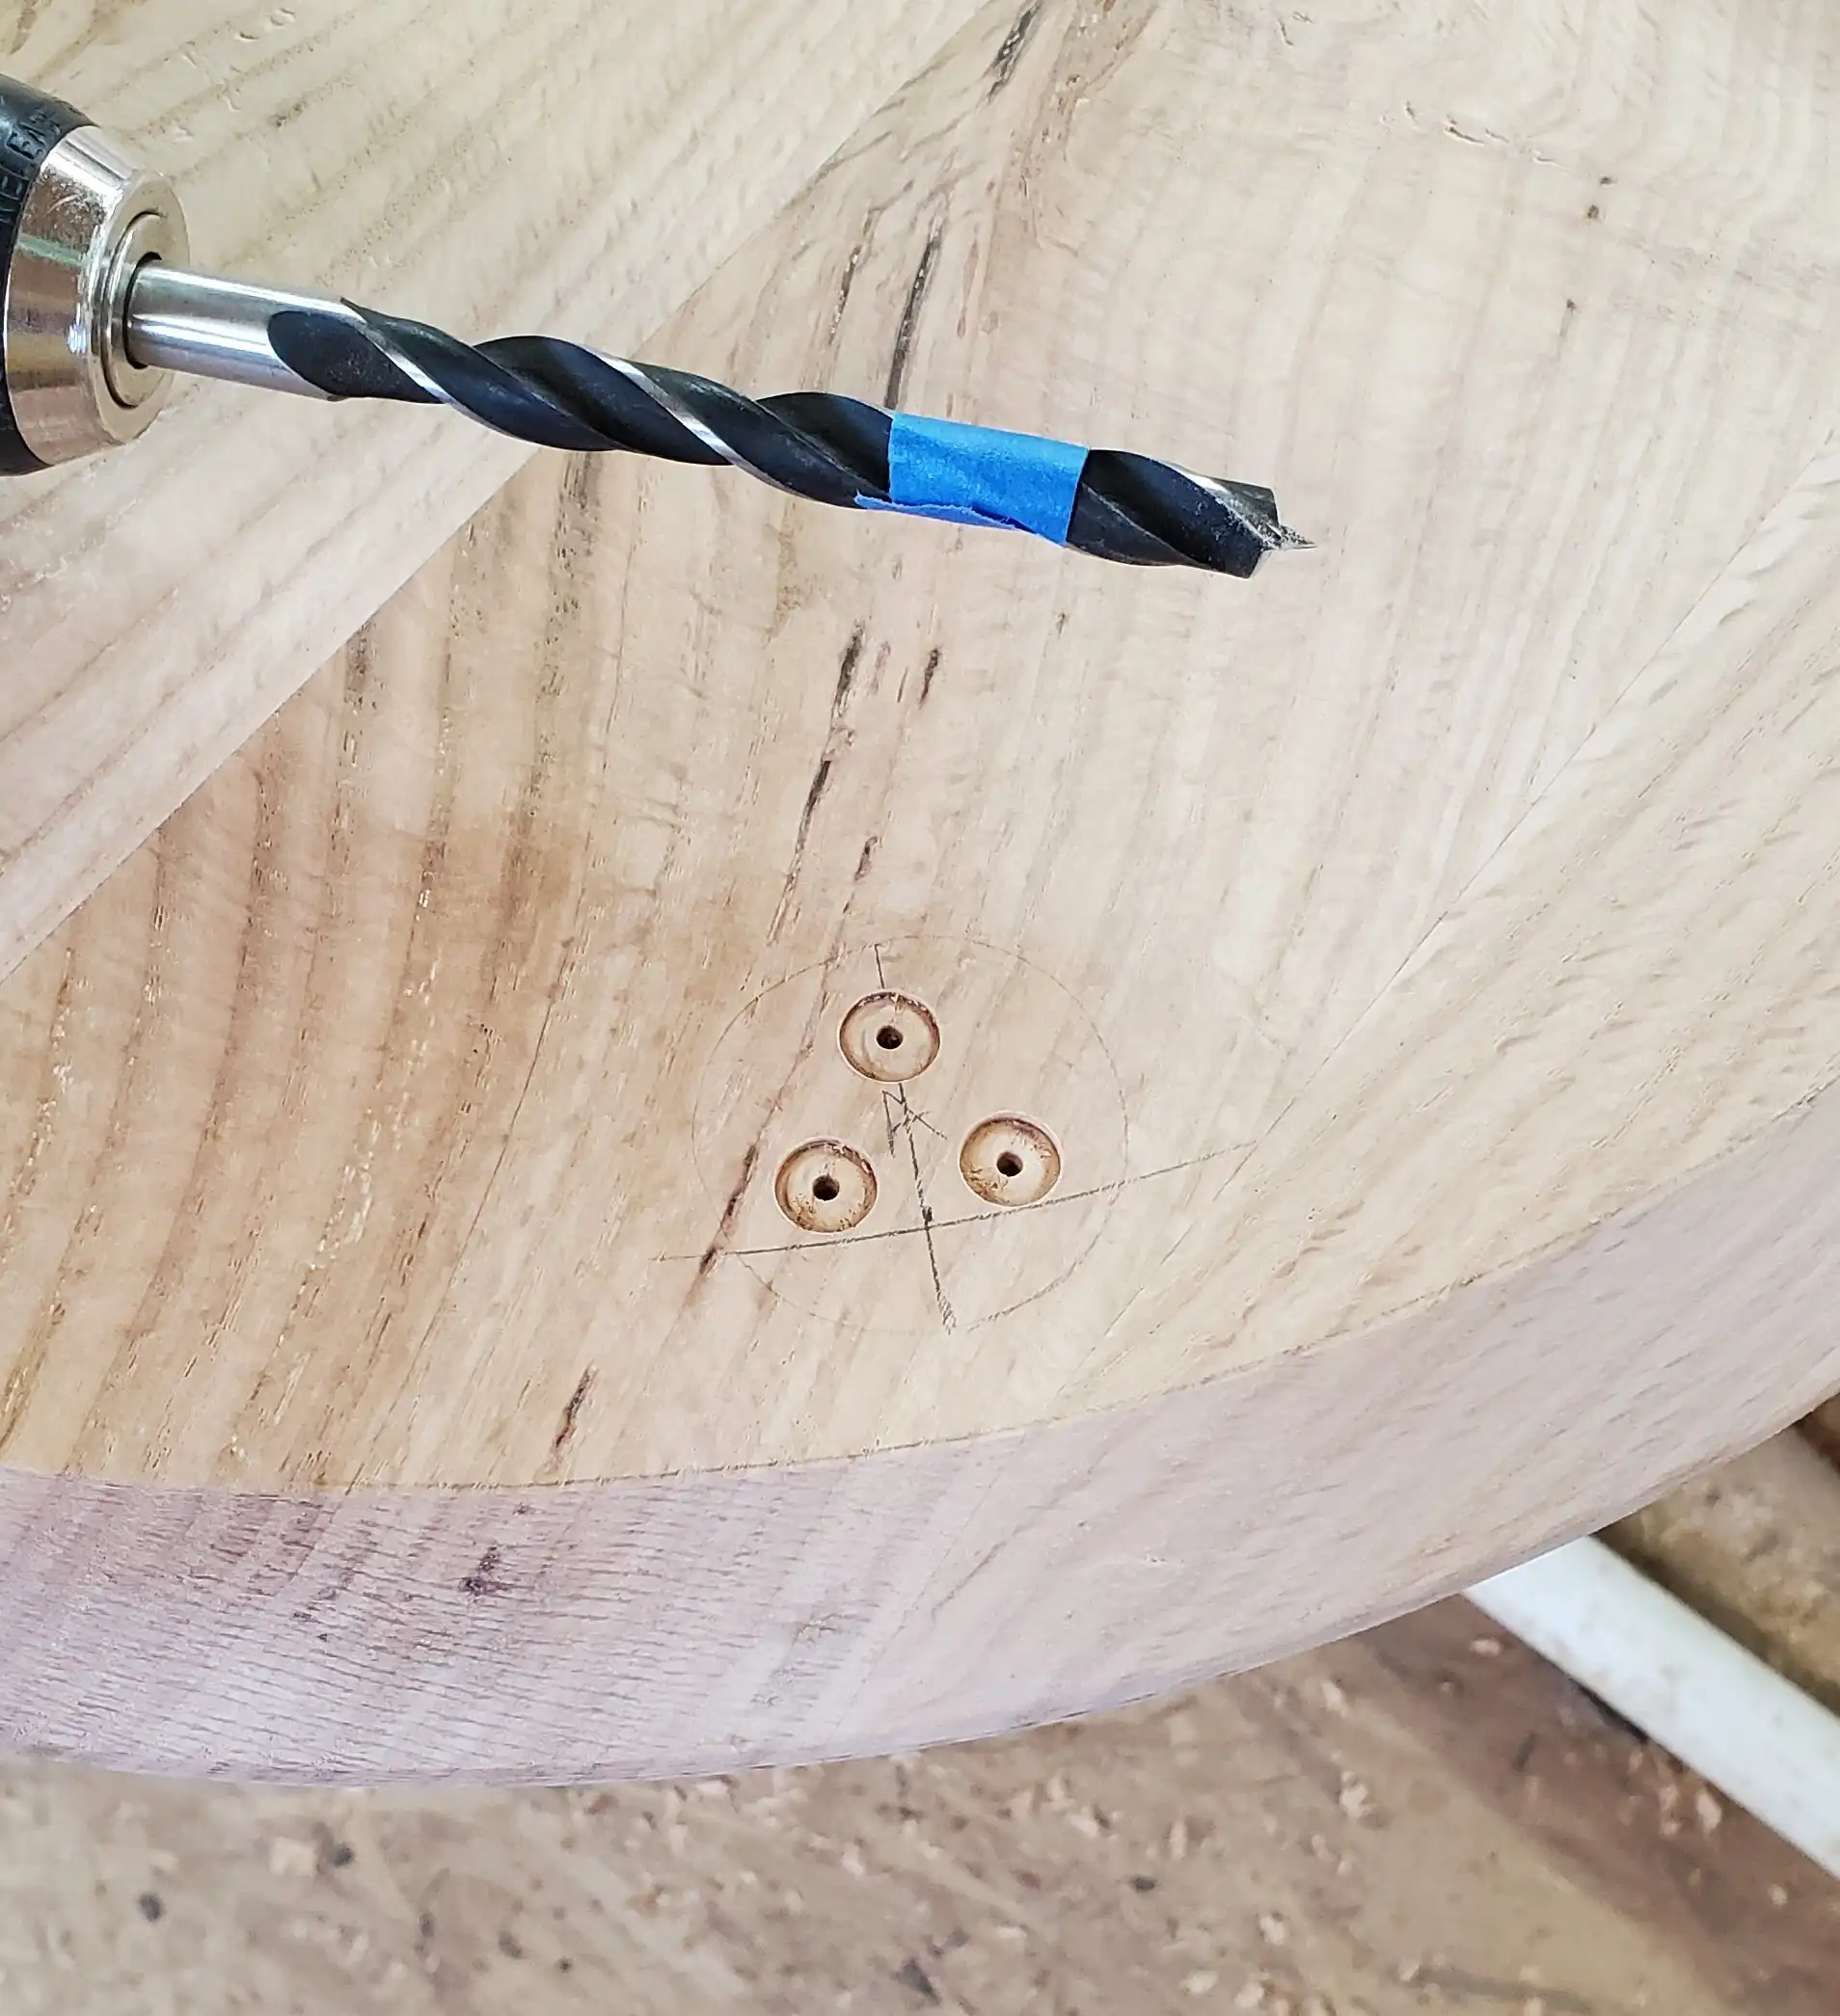
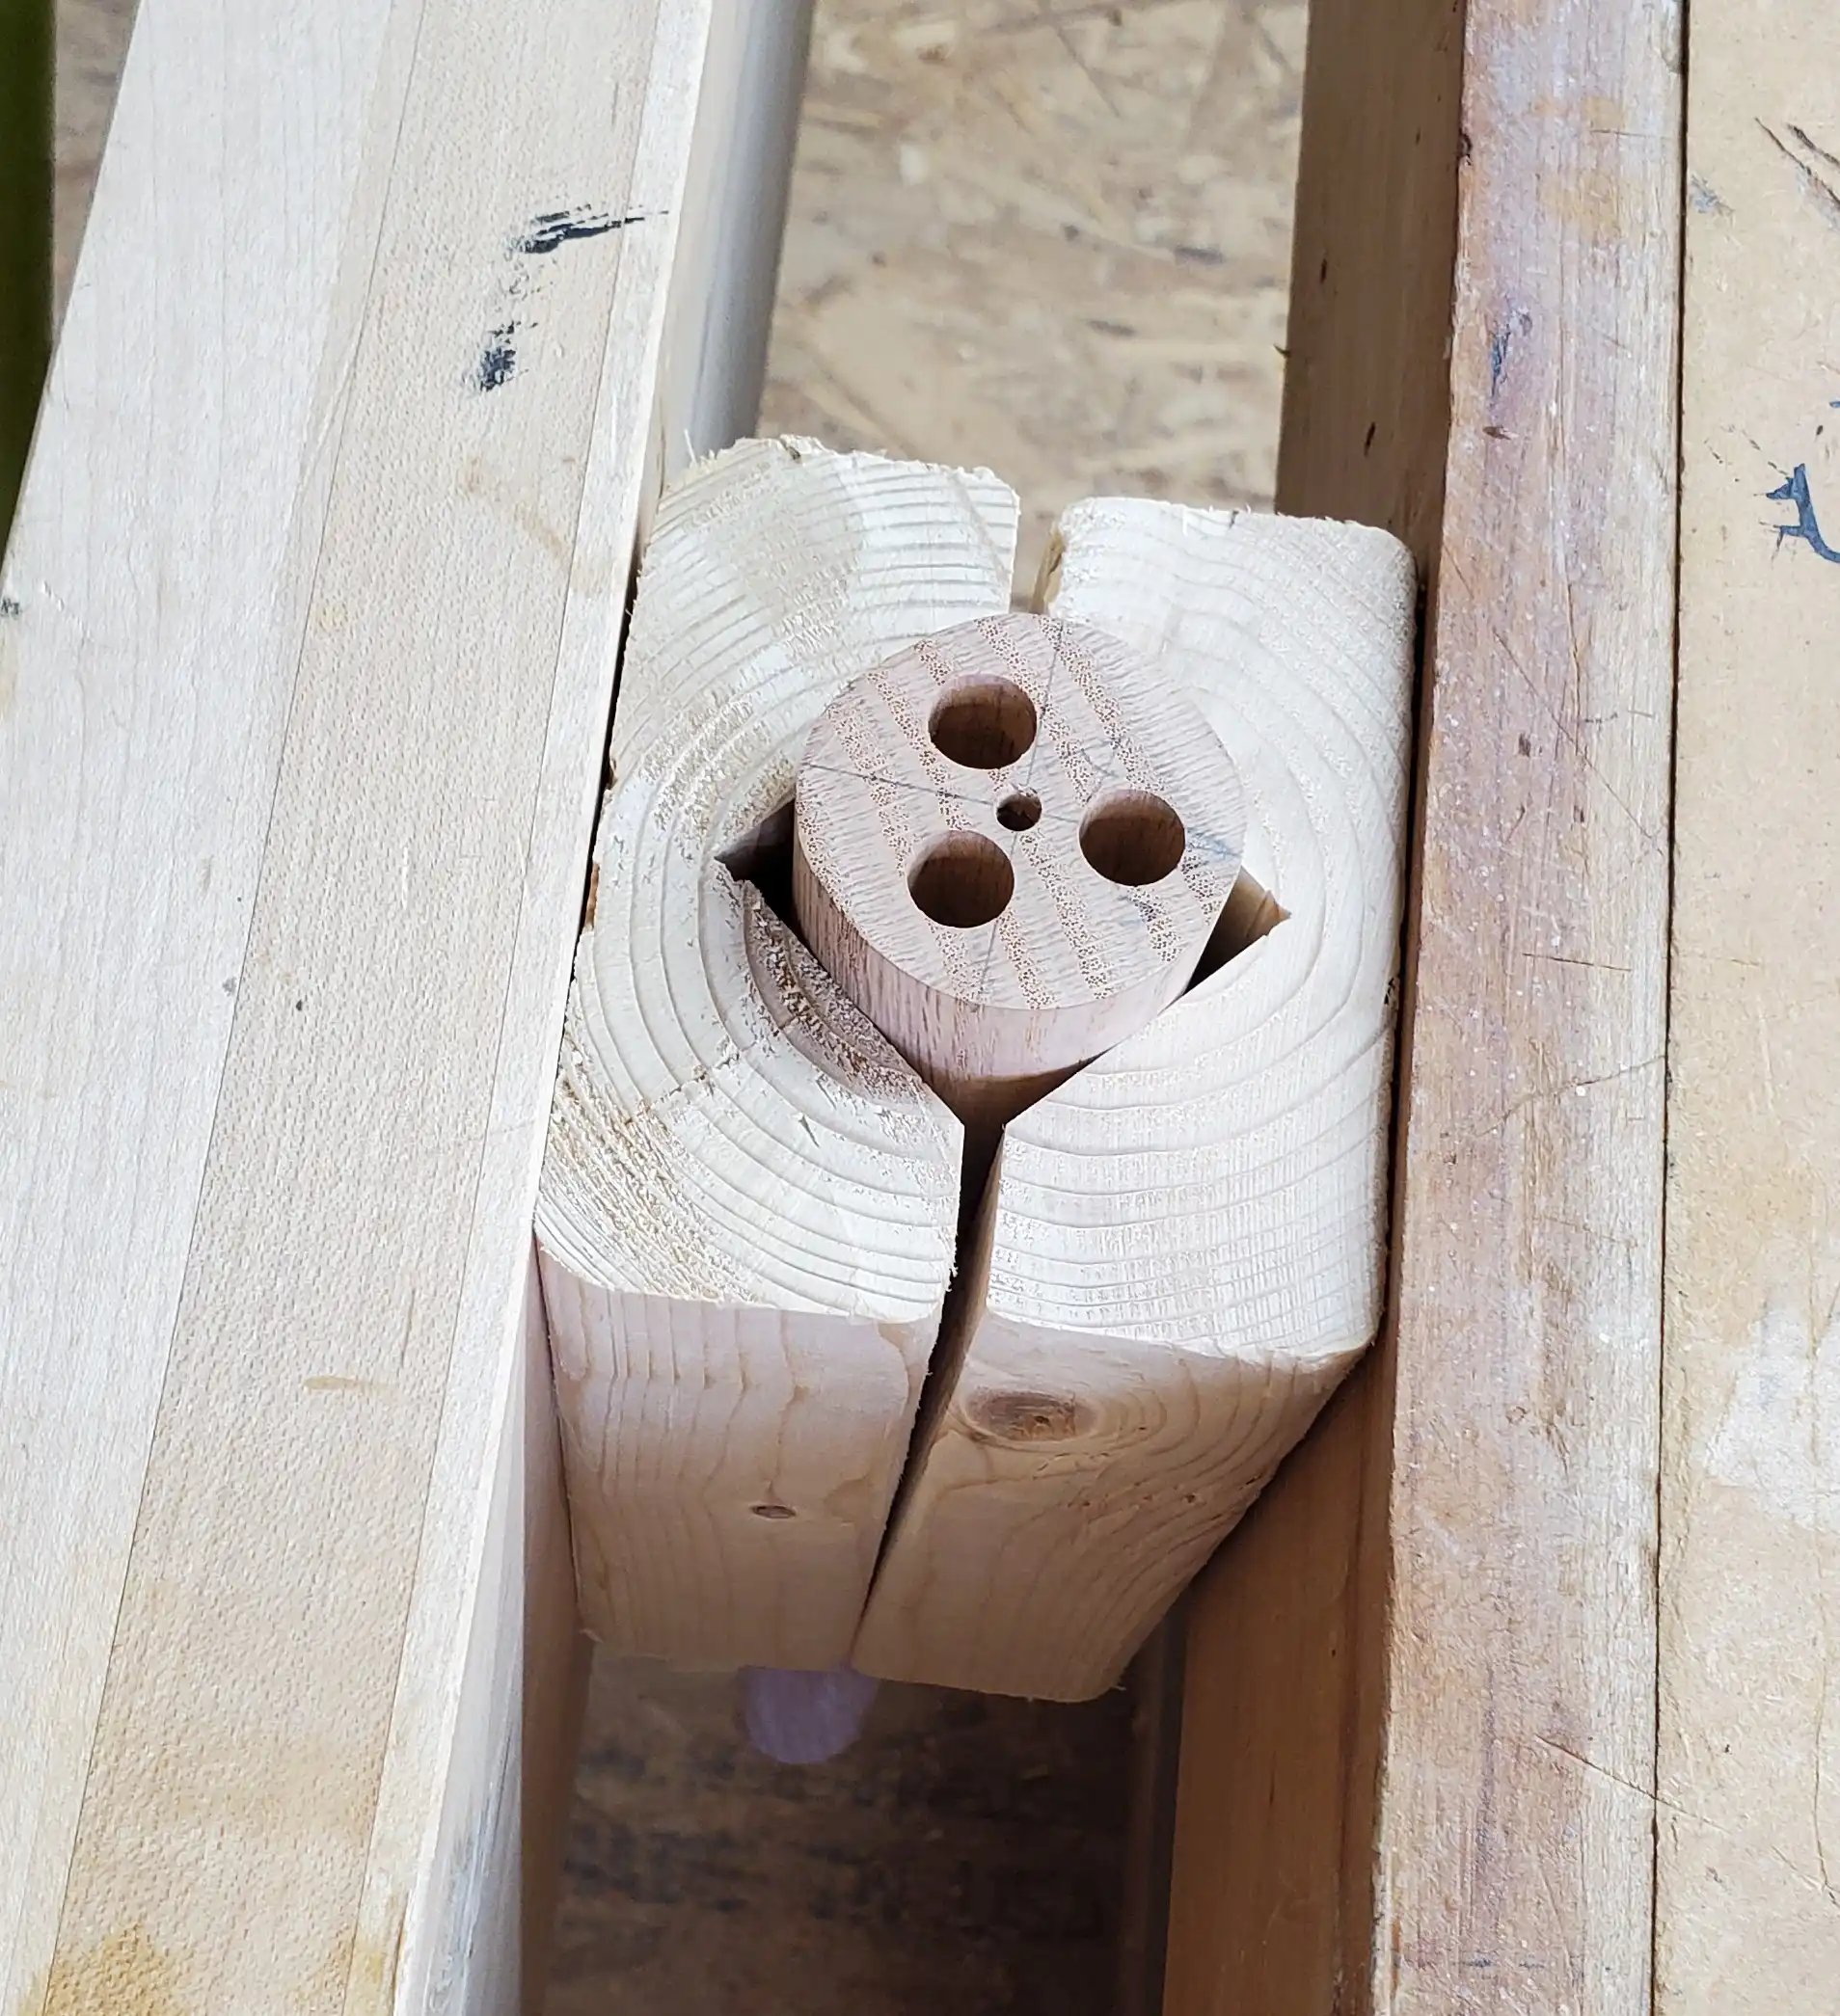
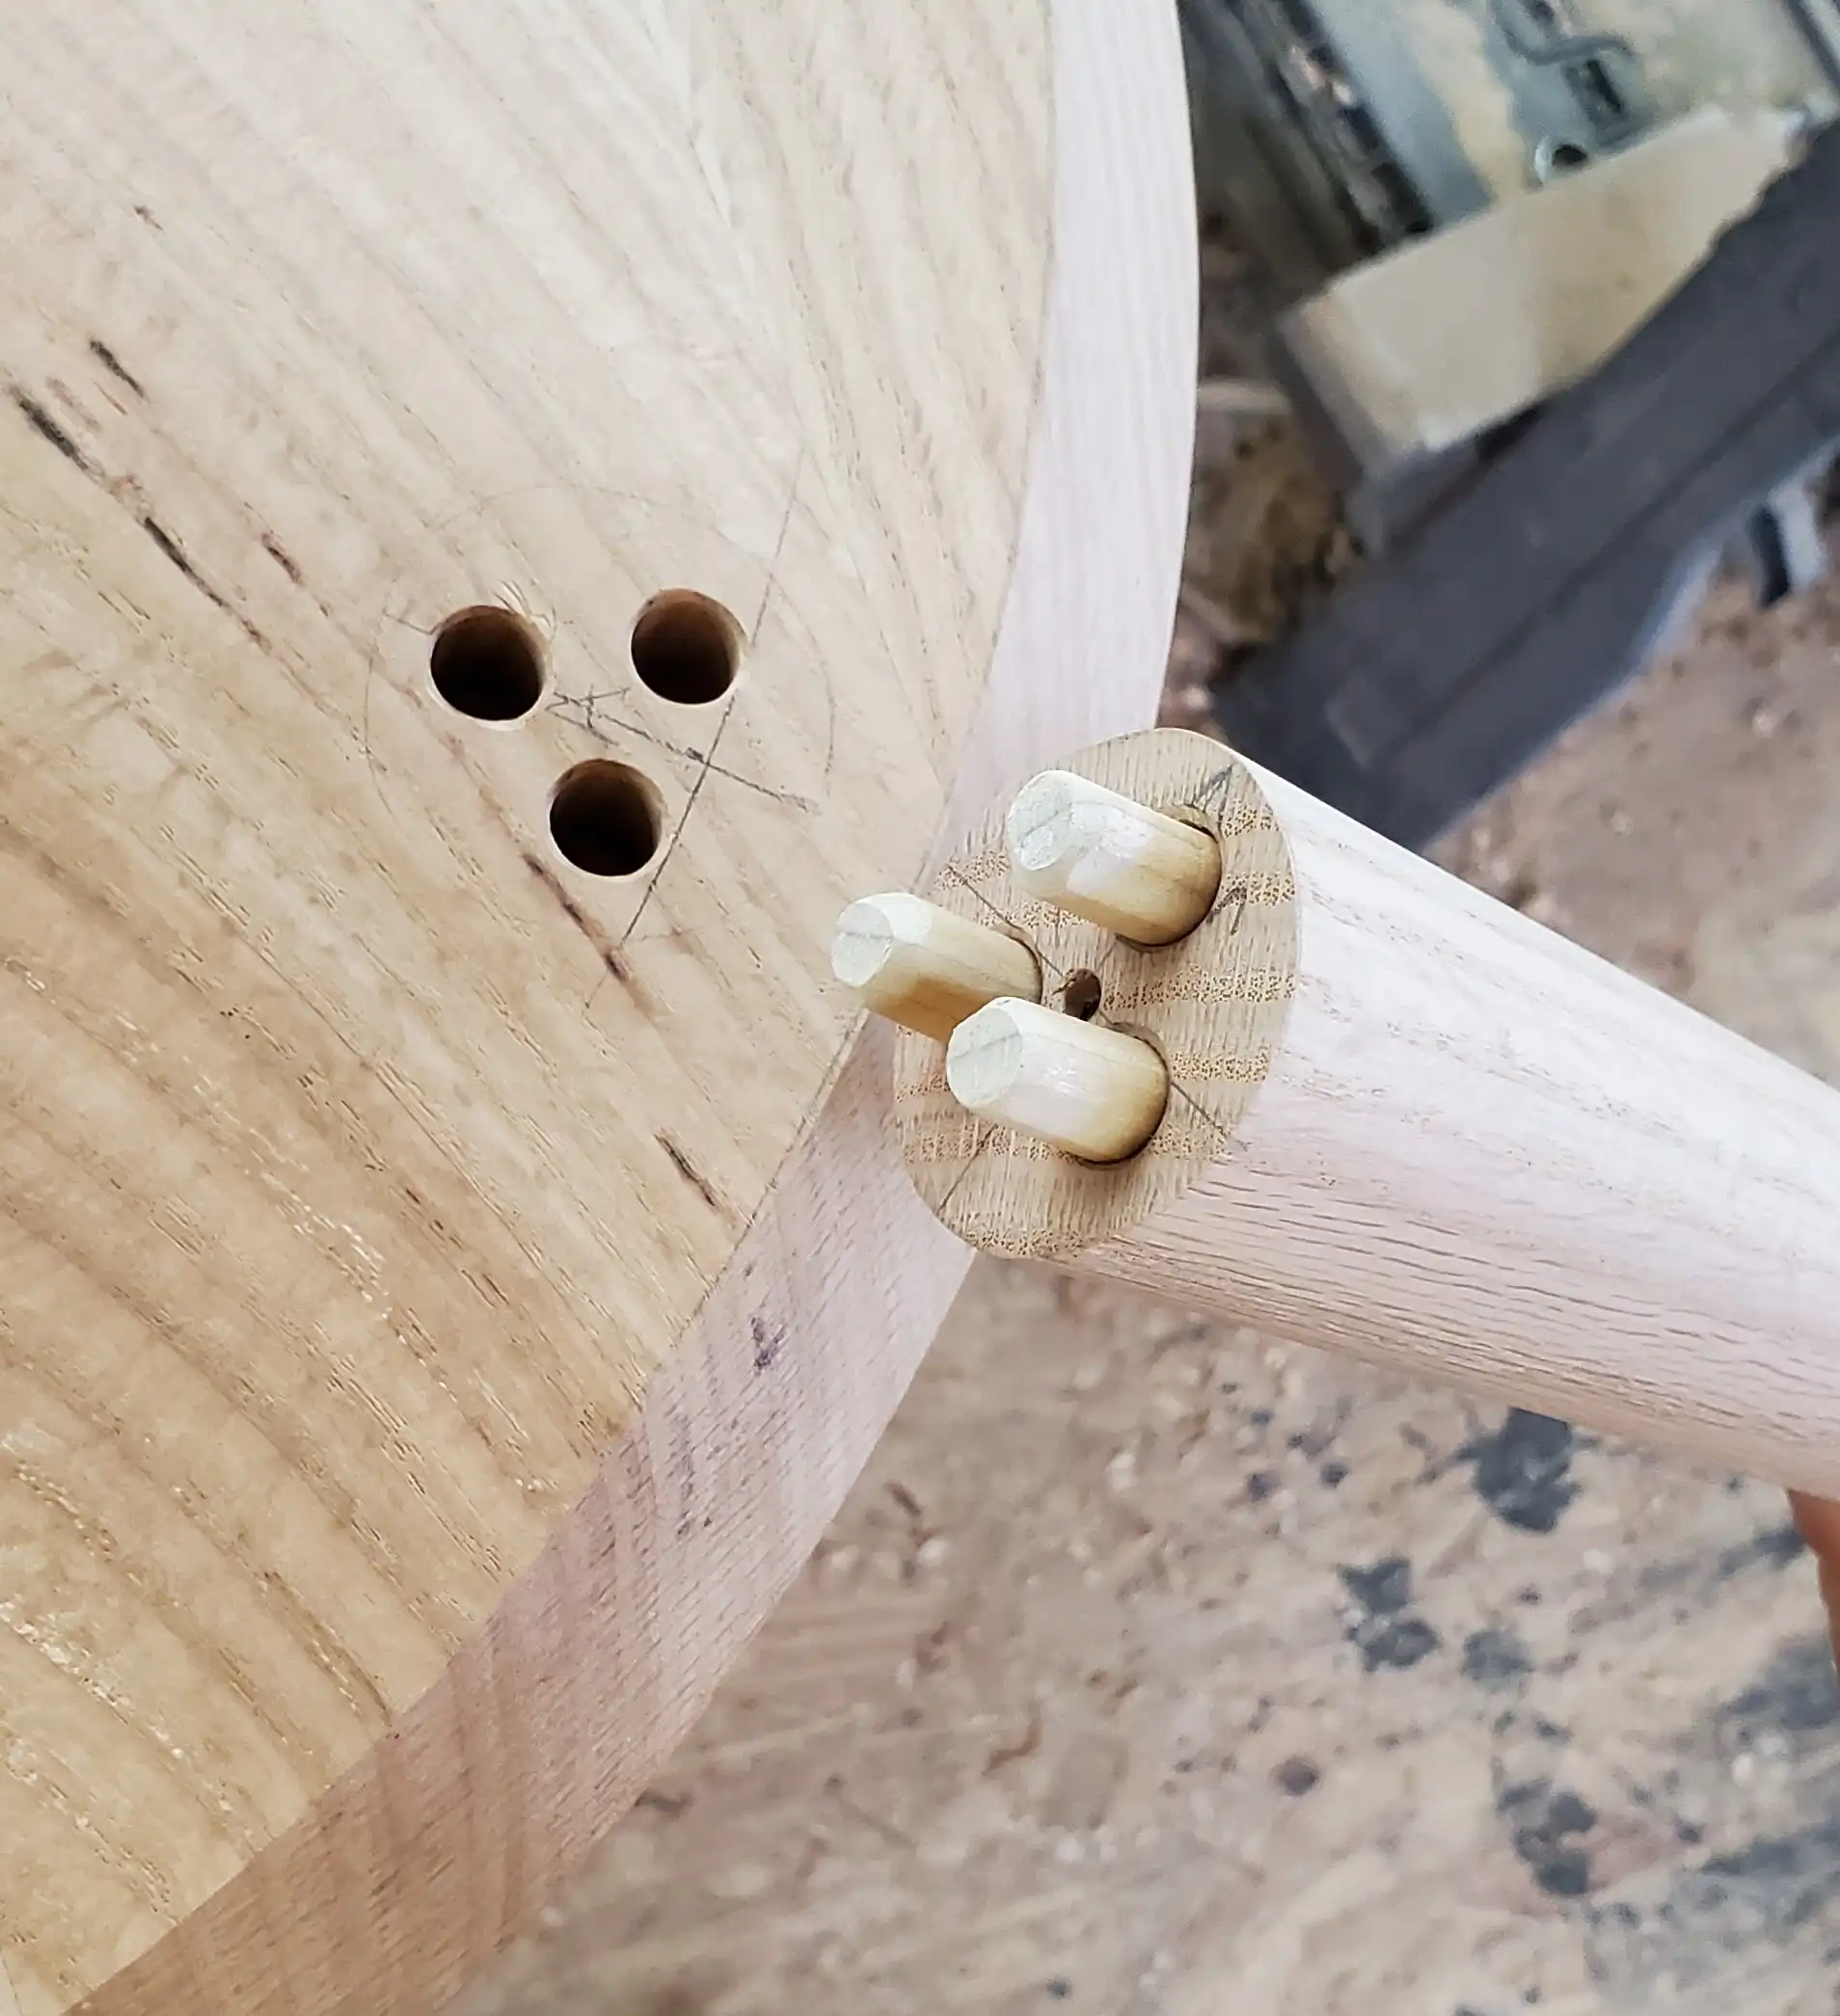
Next up, we begin focusing on attaching the legs to the table top. For this, a set of 3 dowels are used for the joinery to provide a large amount of glue surface to lock the legs into place. One difficulty is drilling the holes in a consistent pattern. For this, I turn to my 3D printer. I printed a quick jig out of plastic to mark out the hole locations.
We then drill the holes into both the ends of the legs and the table top, cut the dowels to size, and do a quick test fit.
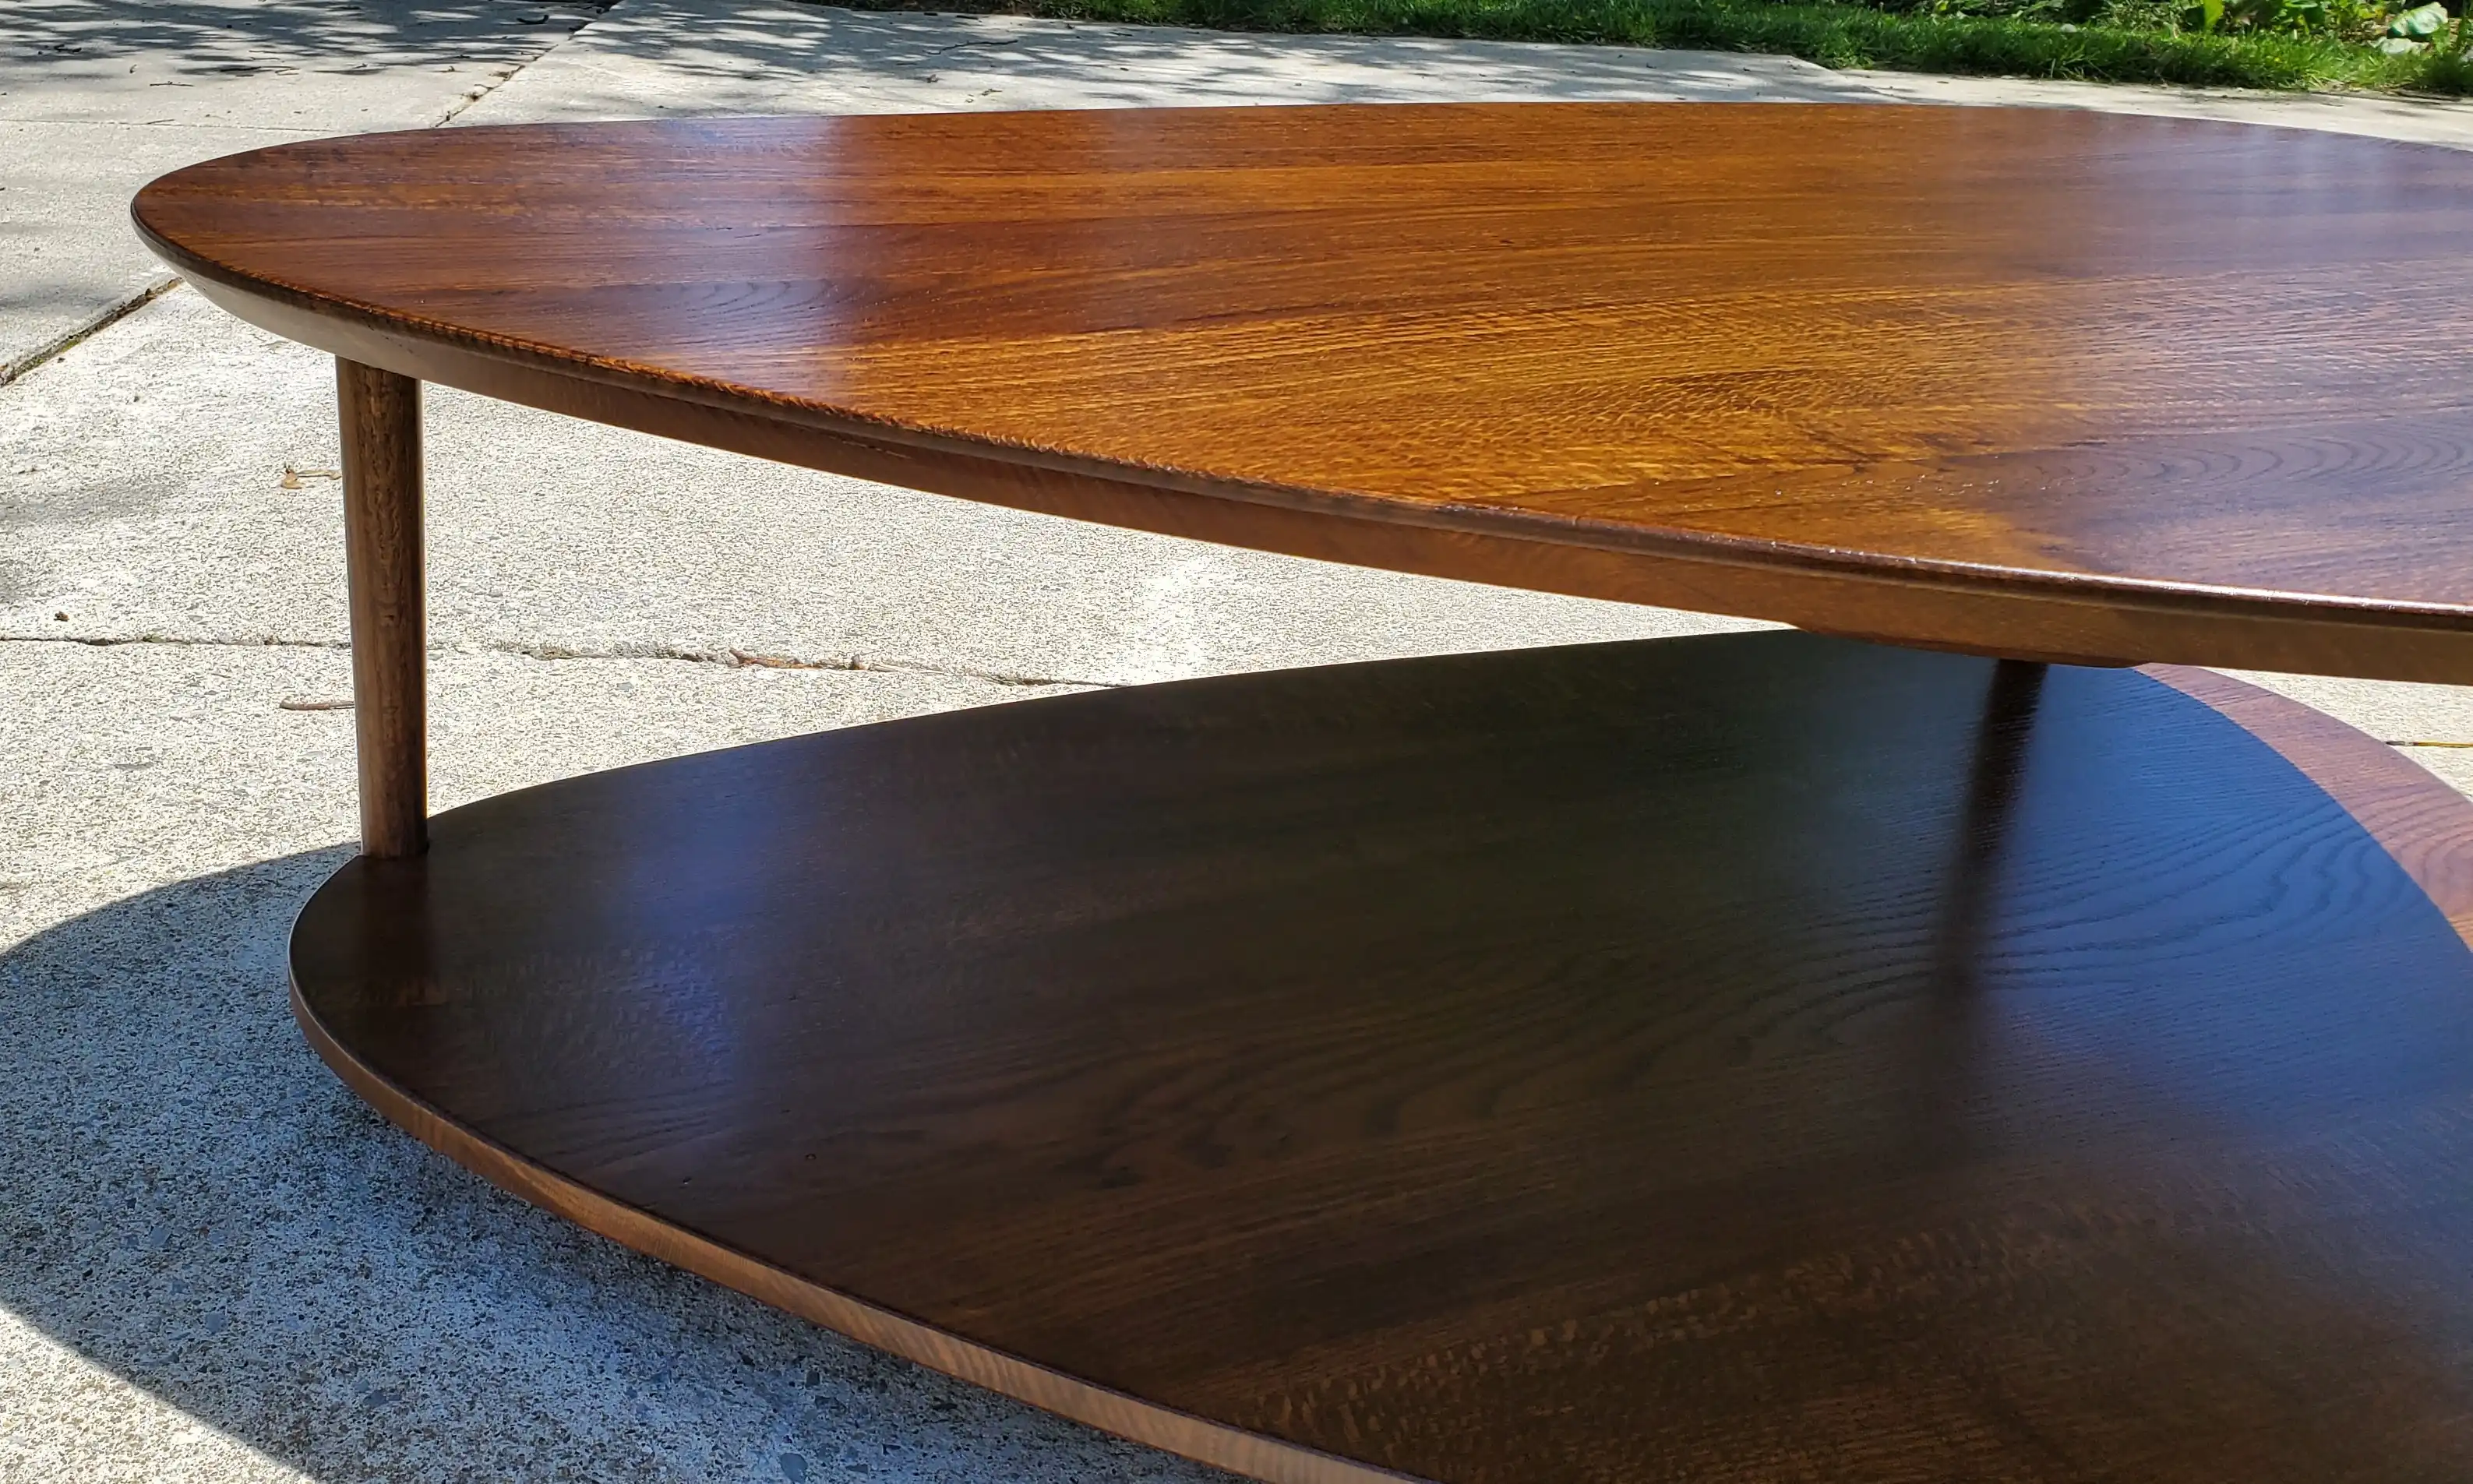
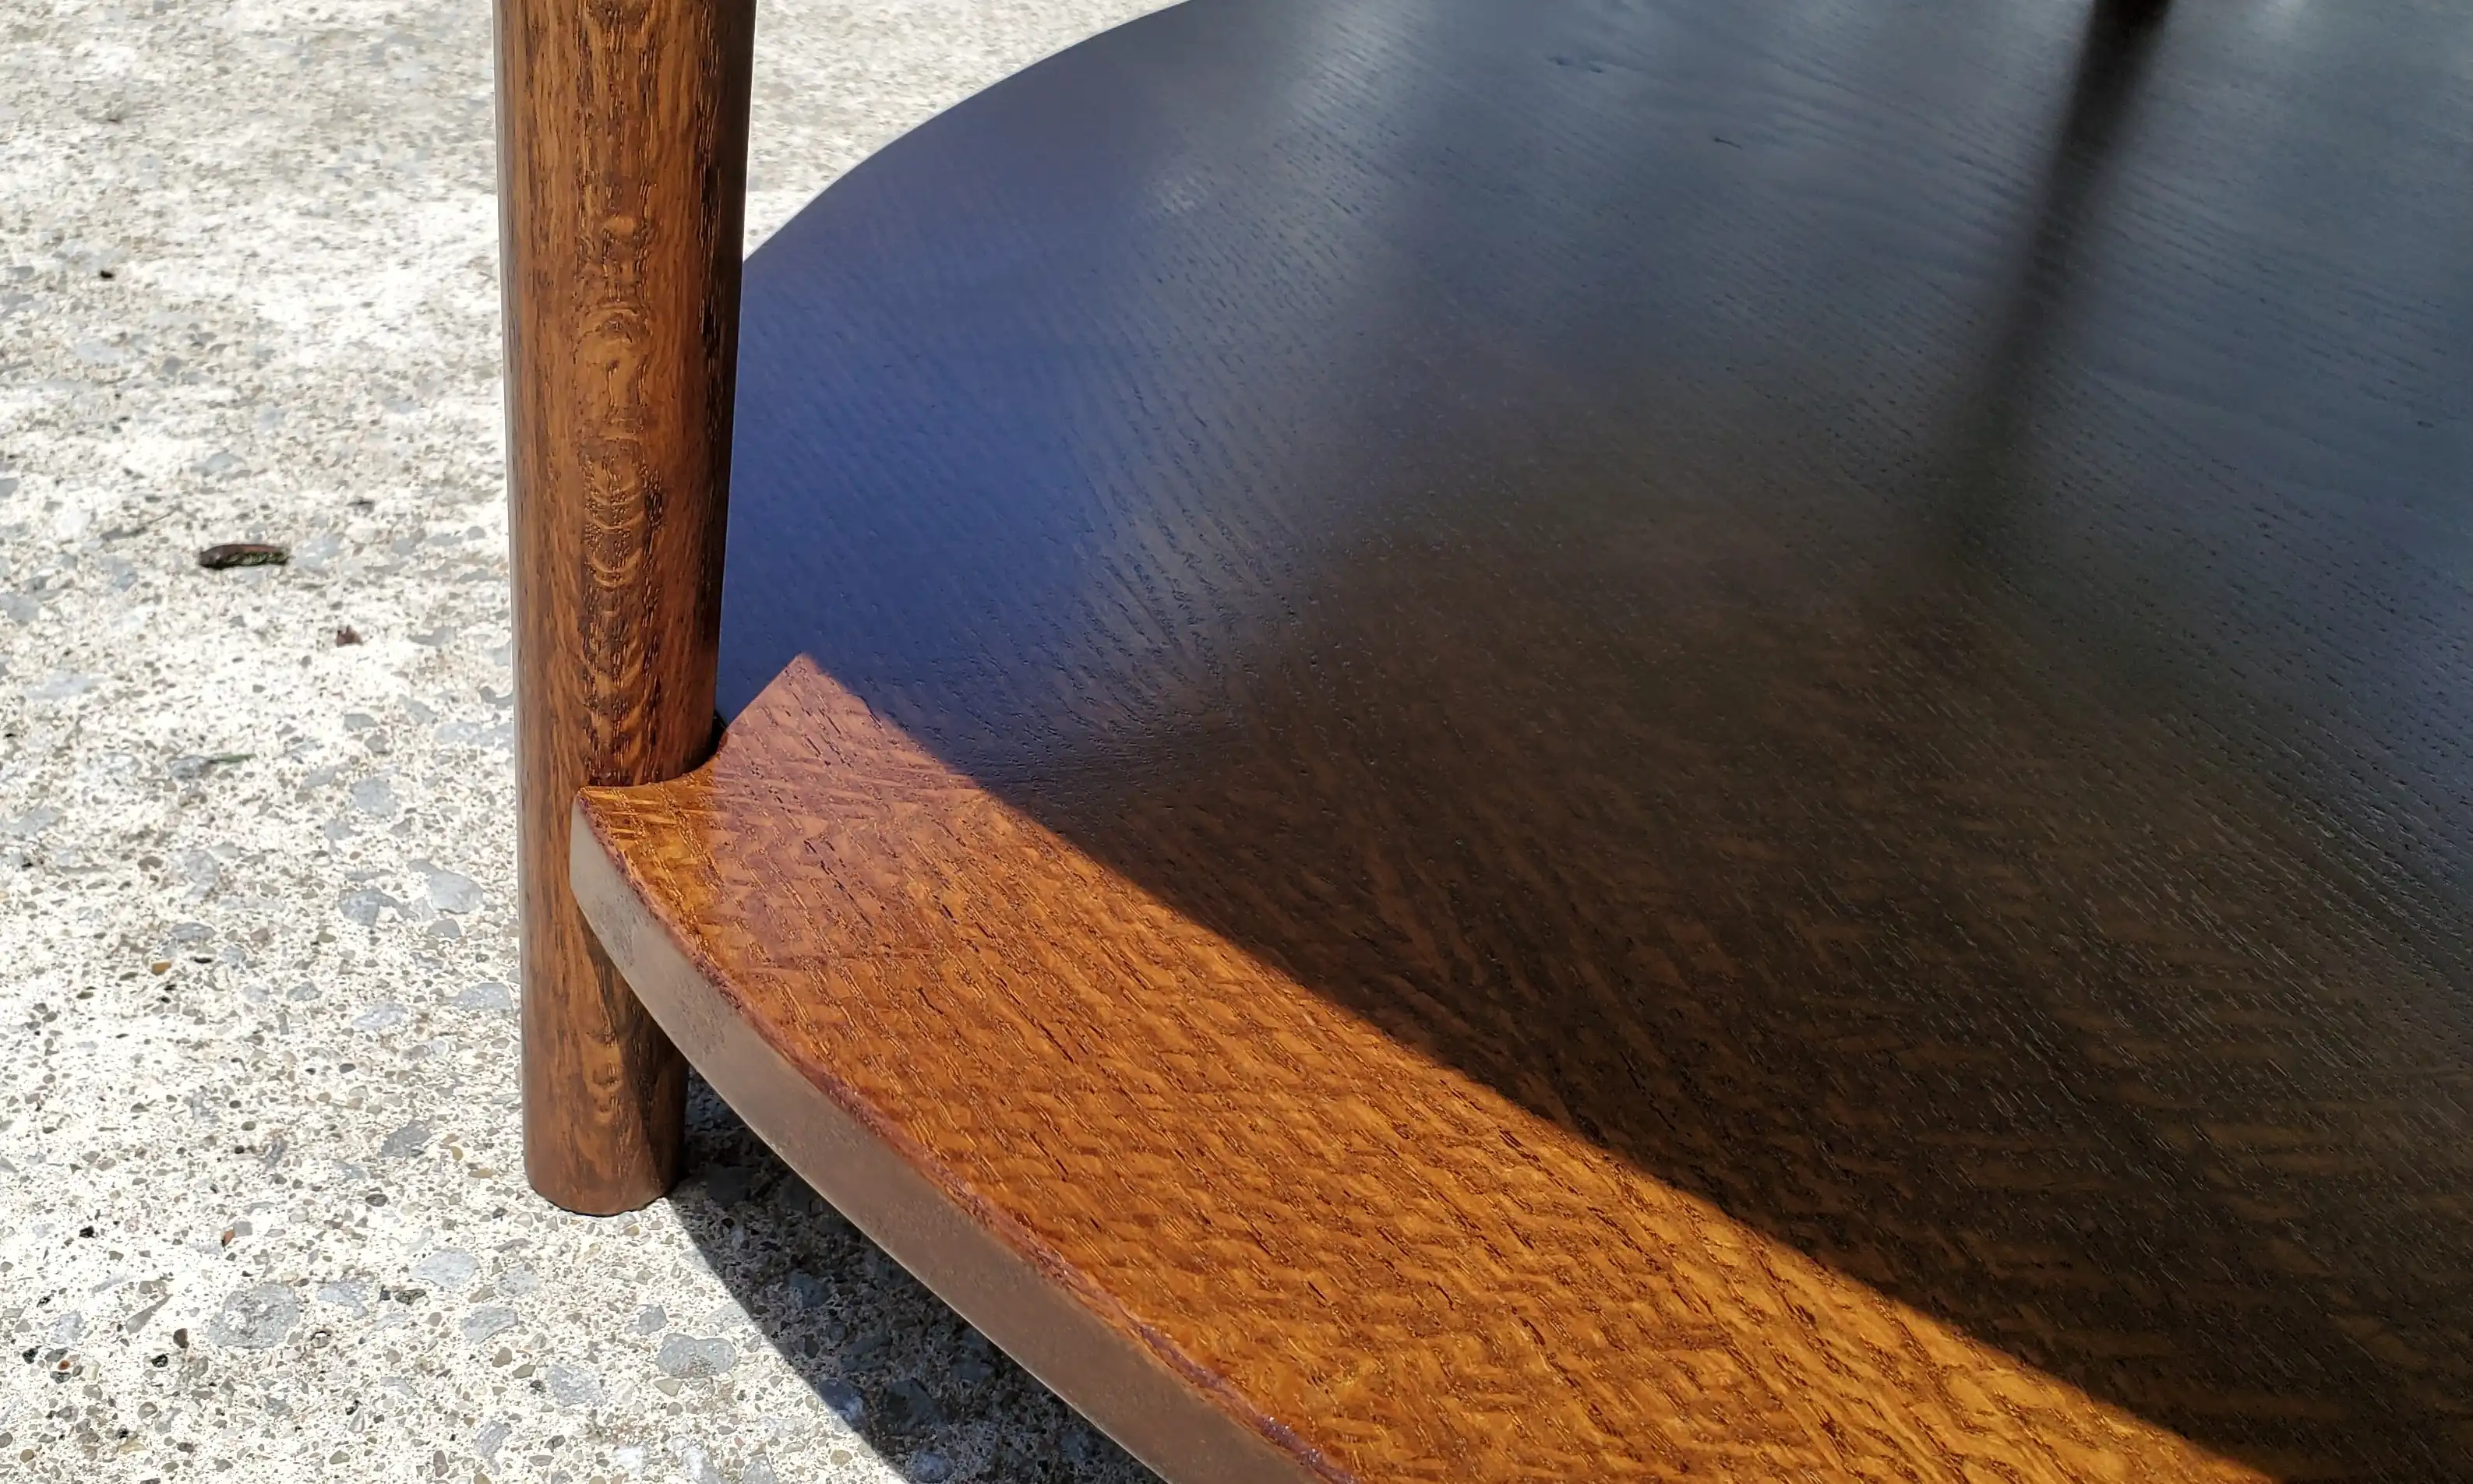
This step officially marks the end of the major woodworking. We now shift to the fine details. While the major top profiles are cut, it is time to sand over the sharp edges and blend the various contours added by our shaper in the previous update. For the bottom shelf, the notches cut to cradle the legs are cleaned-up with a small 1/8" radius roundover and some hand-sanding to get a clean relief when the shelf intersects the leg.
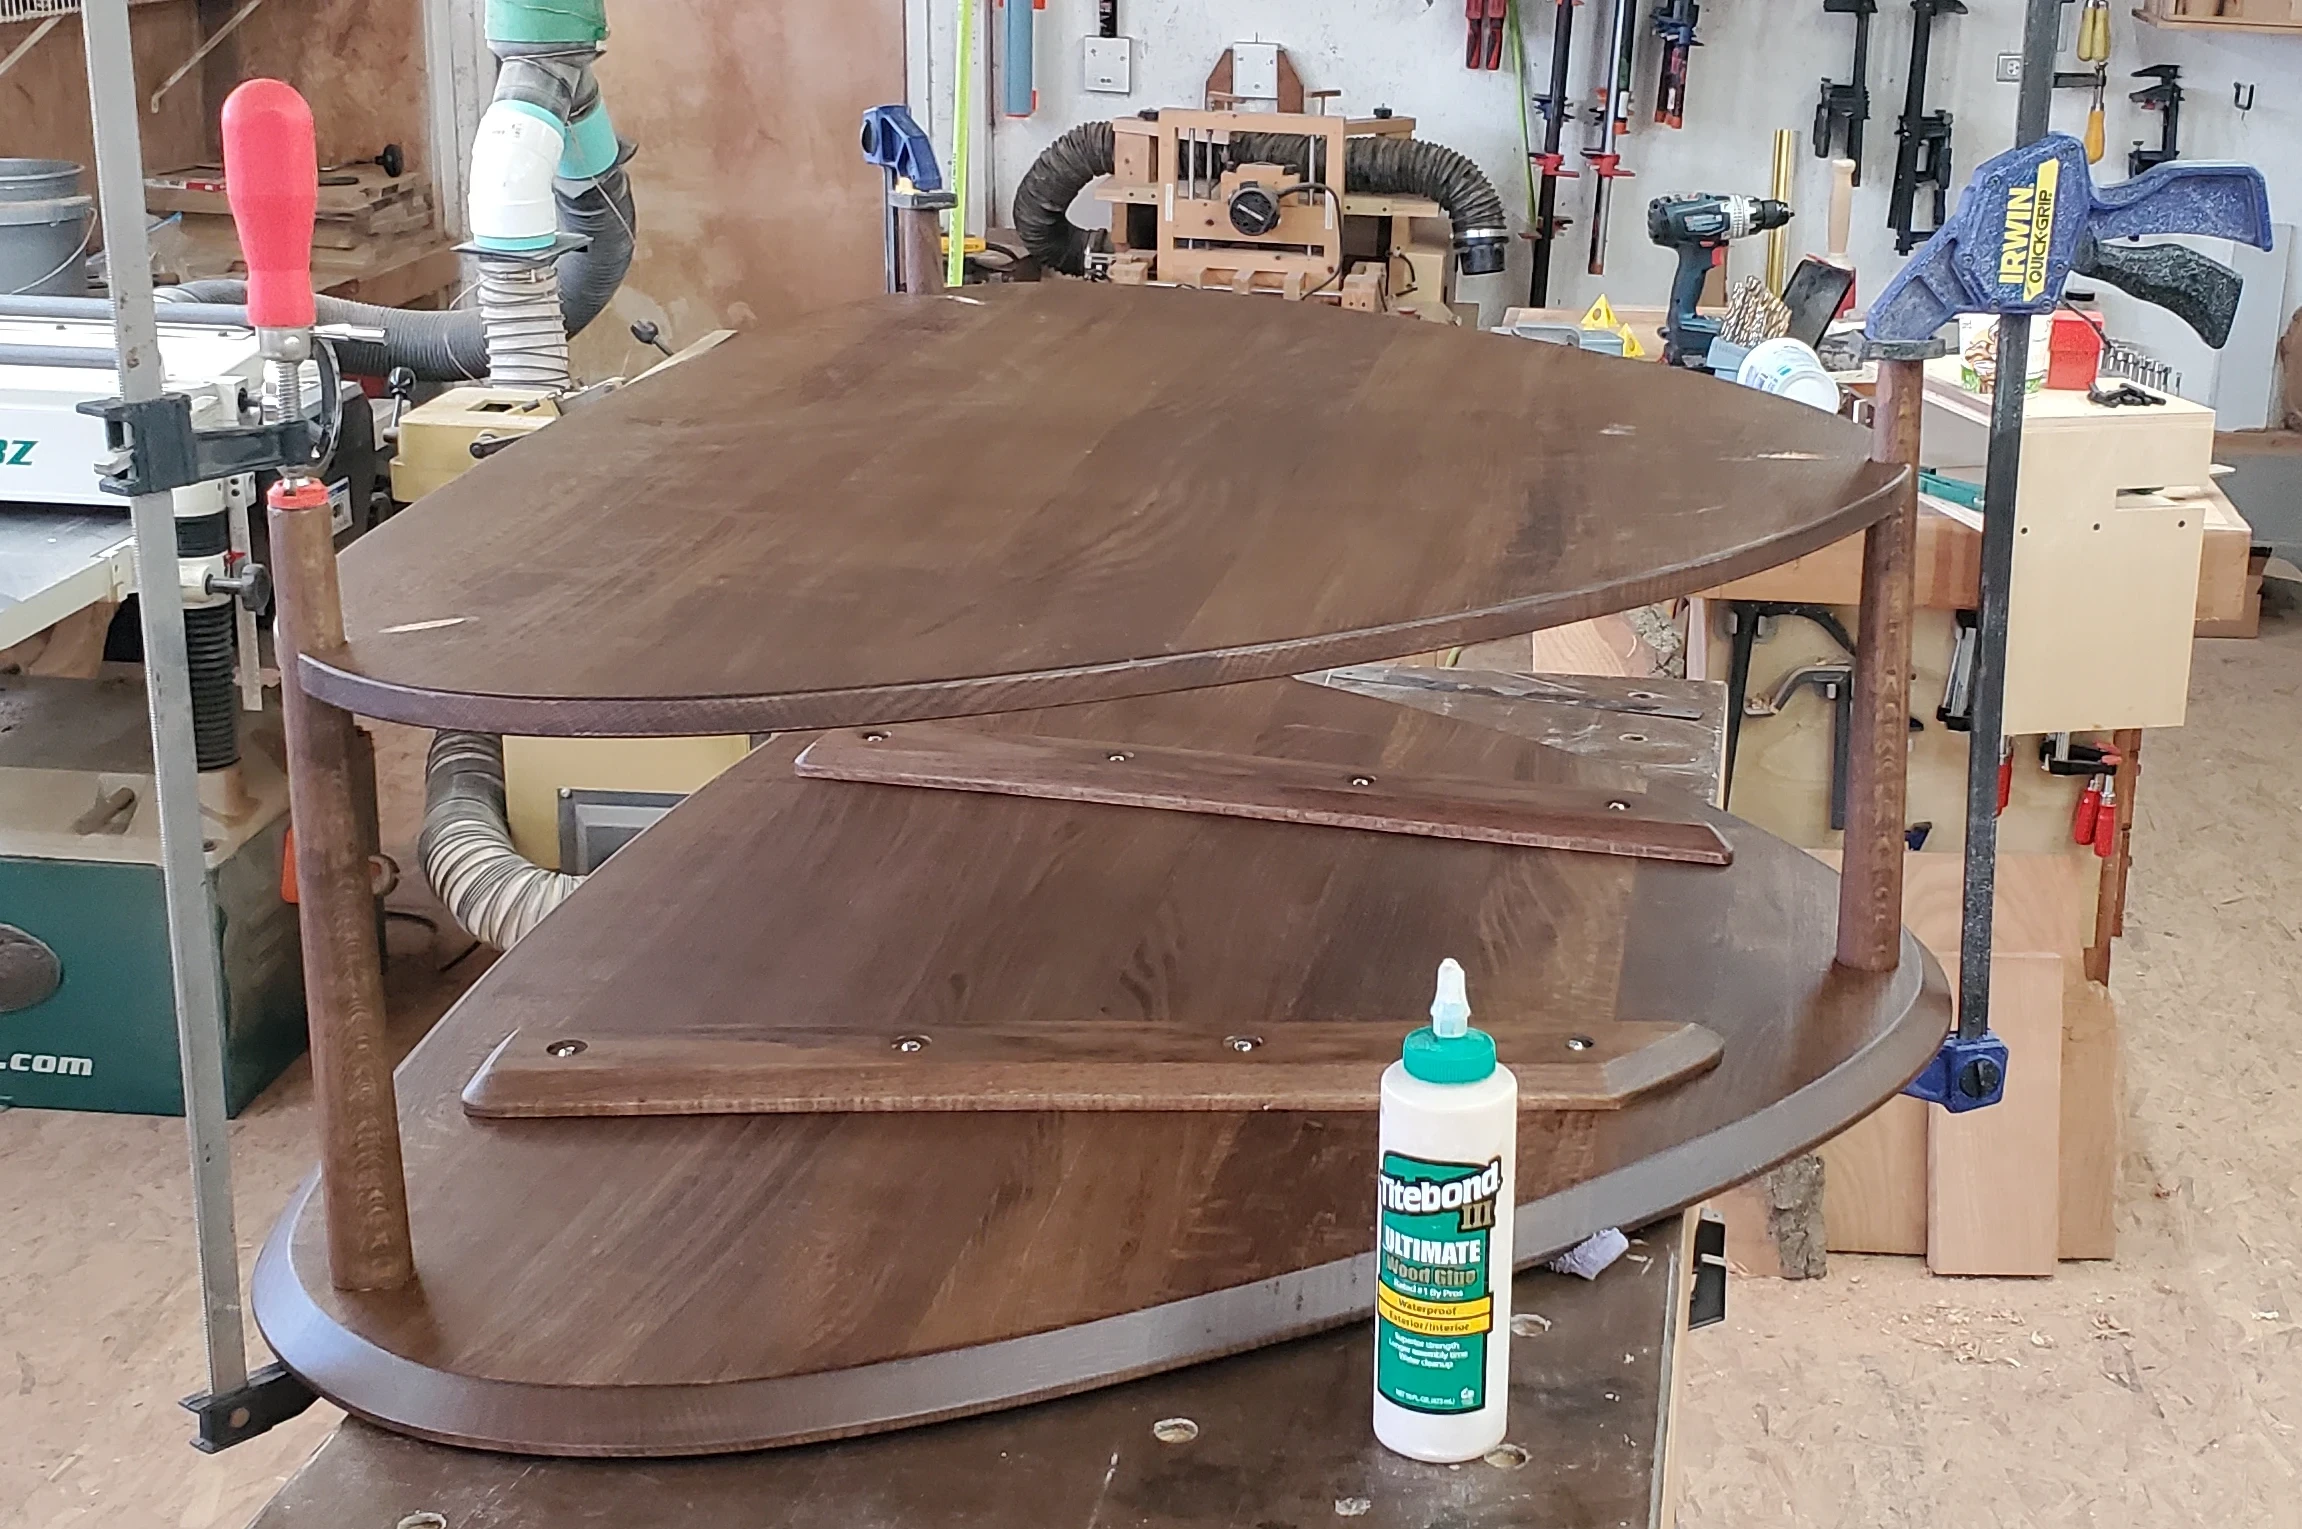
Before final assembly, I opted to pre-finish all the pieces to make the job easier. For the selected color and finish type, we have a few steps to perform on all pieces:
- Sand the entire piece smooth and fill any defects with epoxy or glue
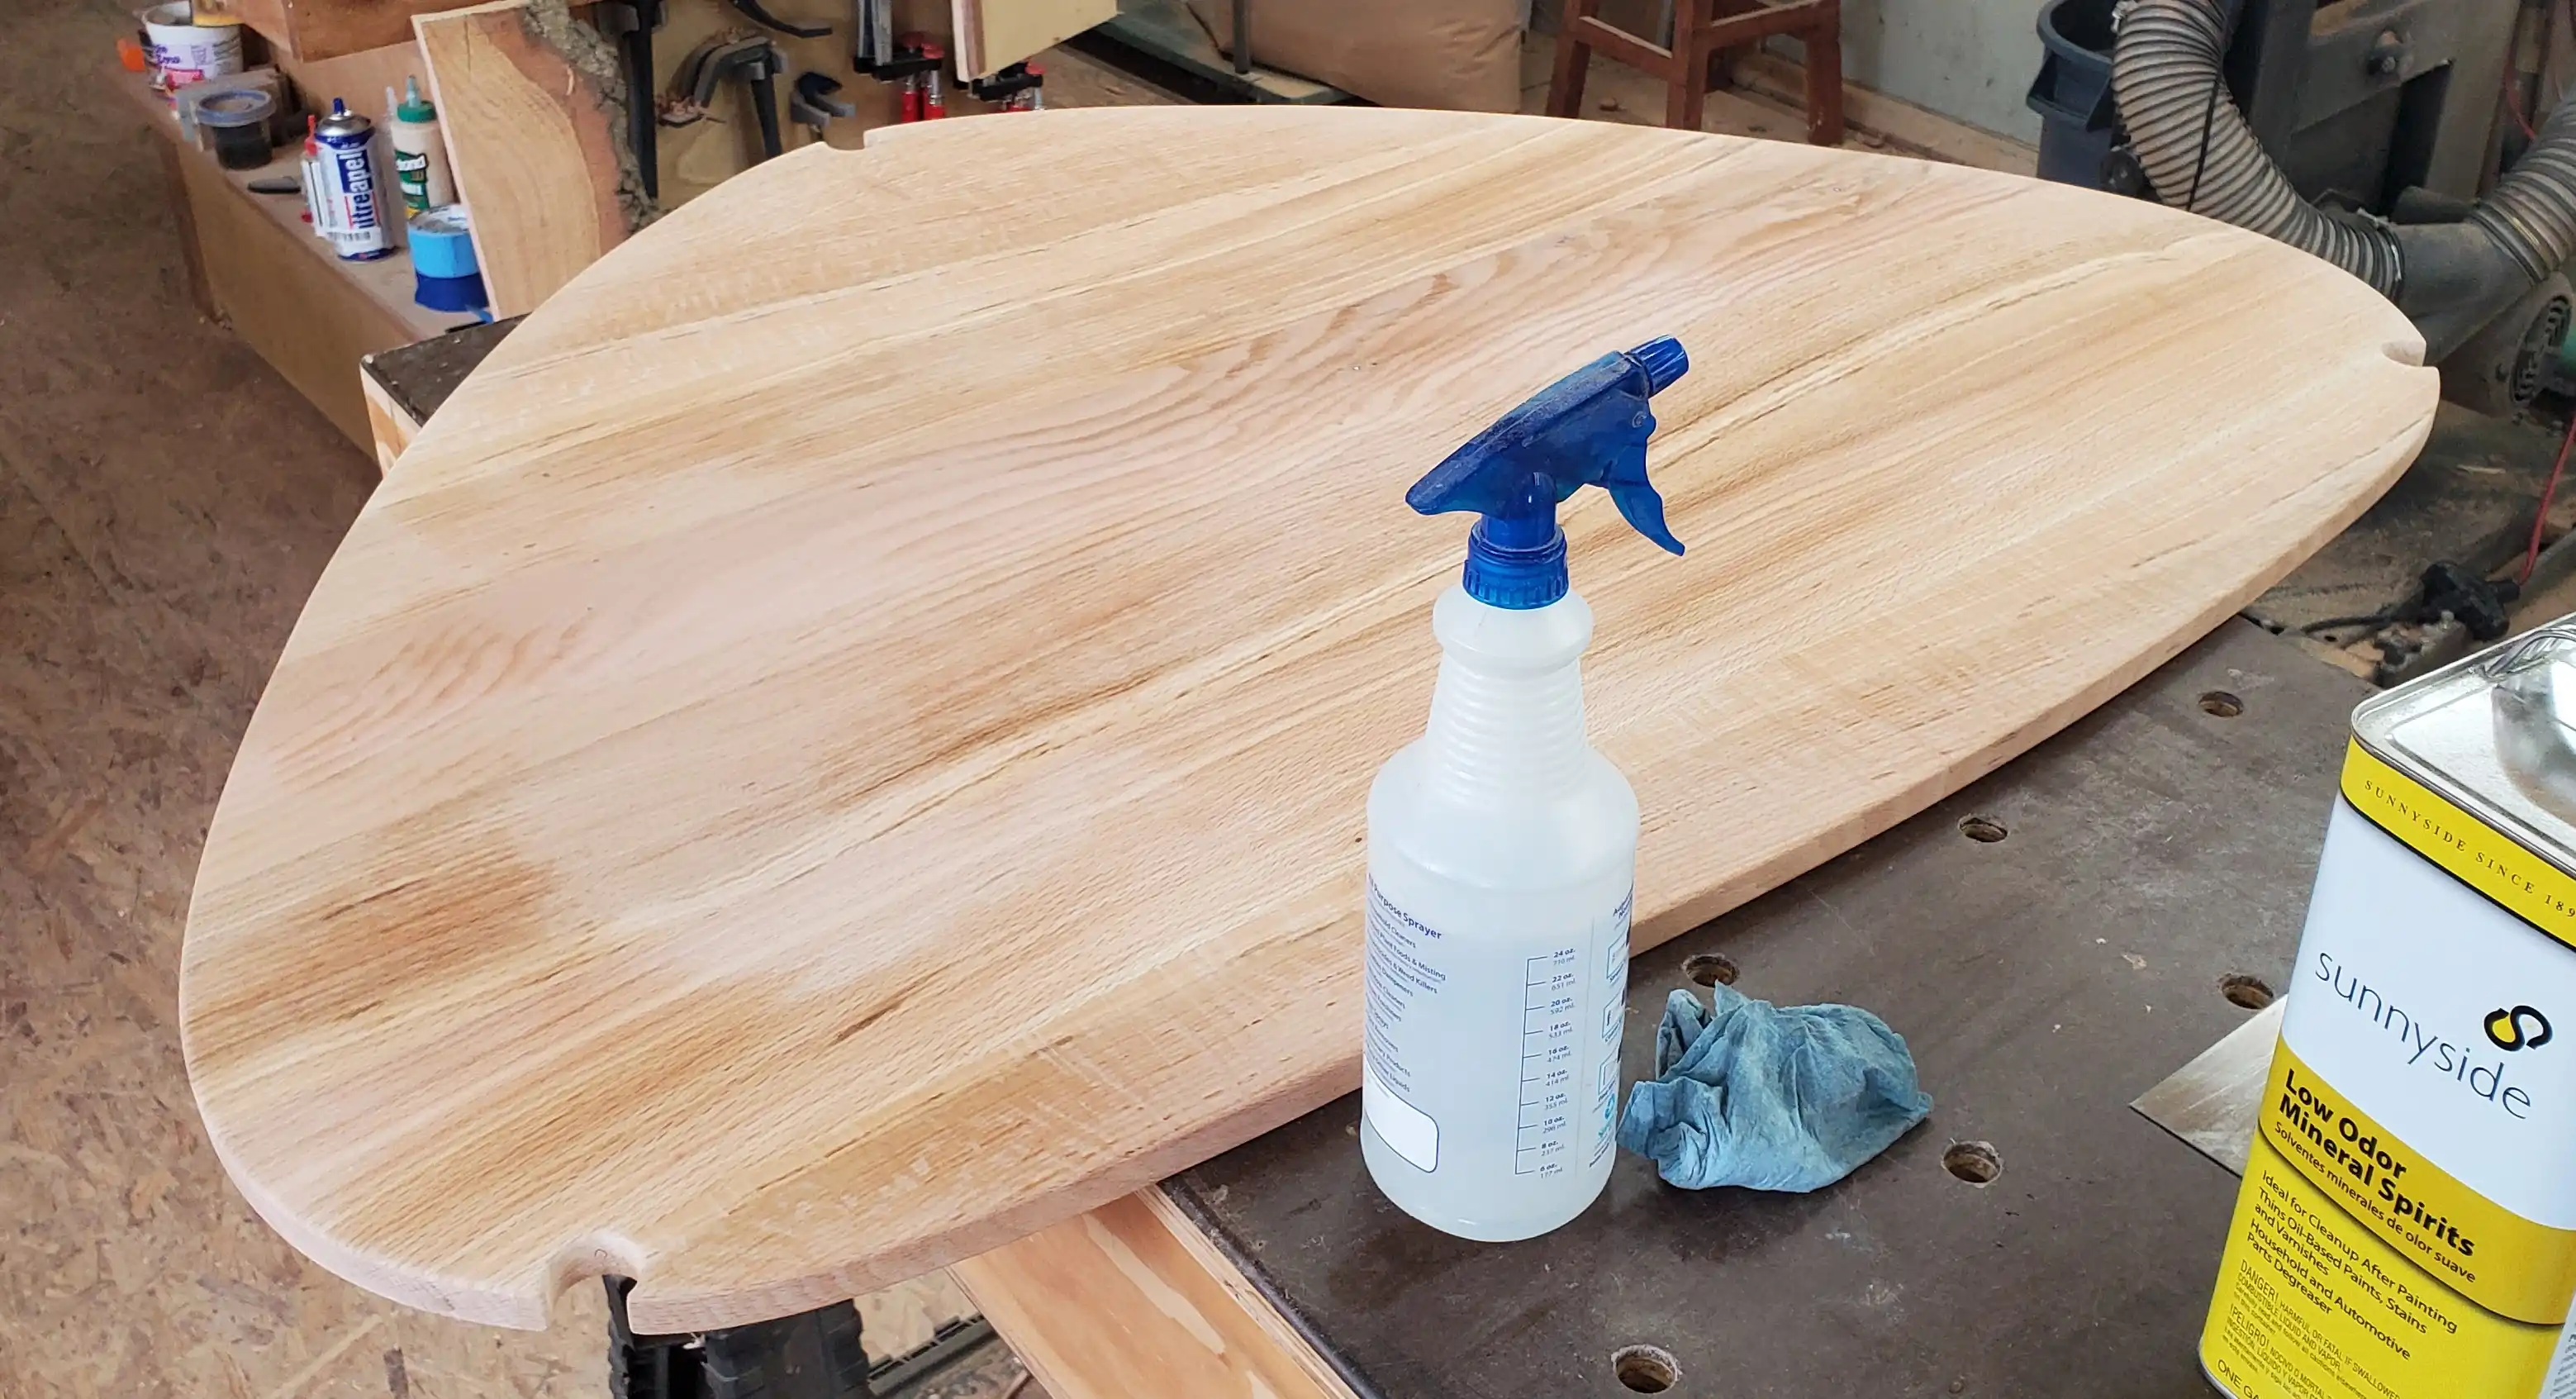
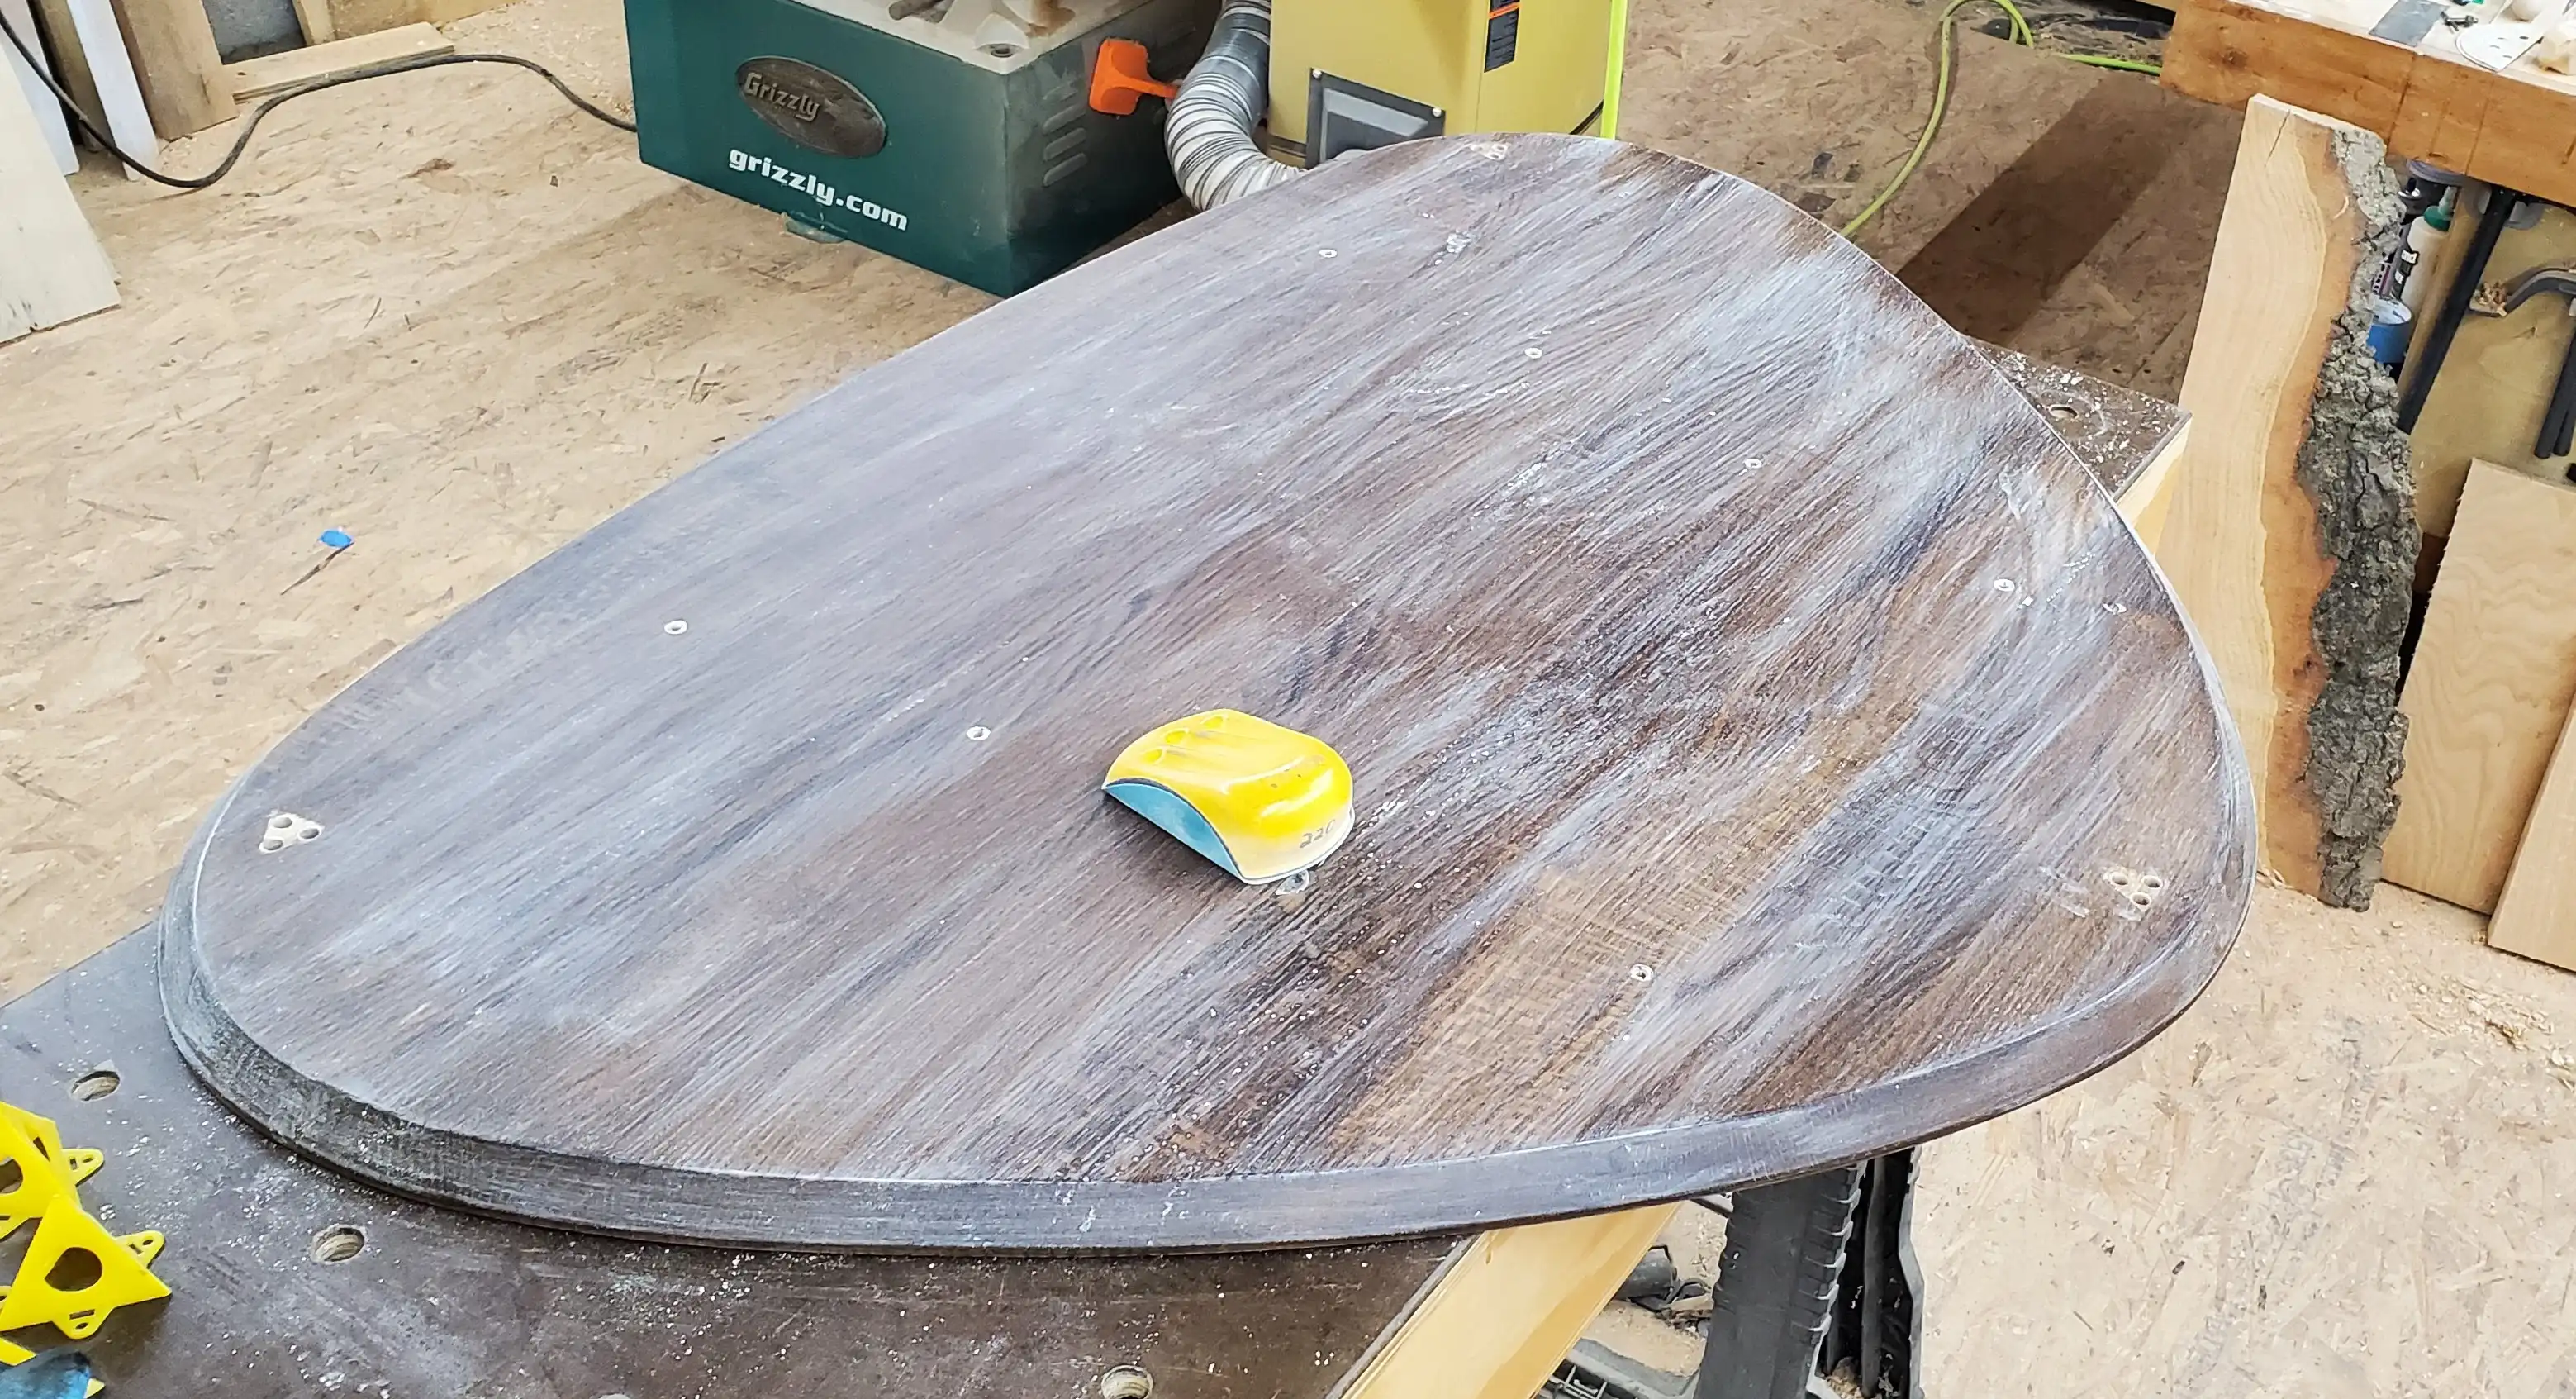
- Raise the grain. Since we are using water-based finishes, we pre-wet the surface with water so that the very surface wood grain swells creating a rough surface. We then lightly sand this back to smooth. This step makes sure that this swelling doesn’t happen once we apply the finish.
- Apply the dye stain.
- Apply the top coat to seal everything together. A total of 4 coats was applied to the entire piece sanding in between coats.
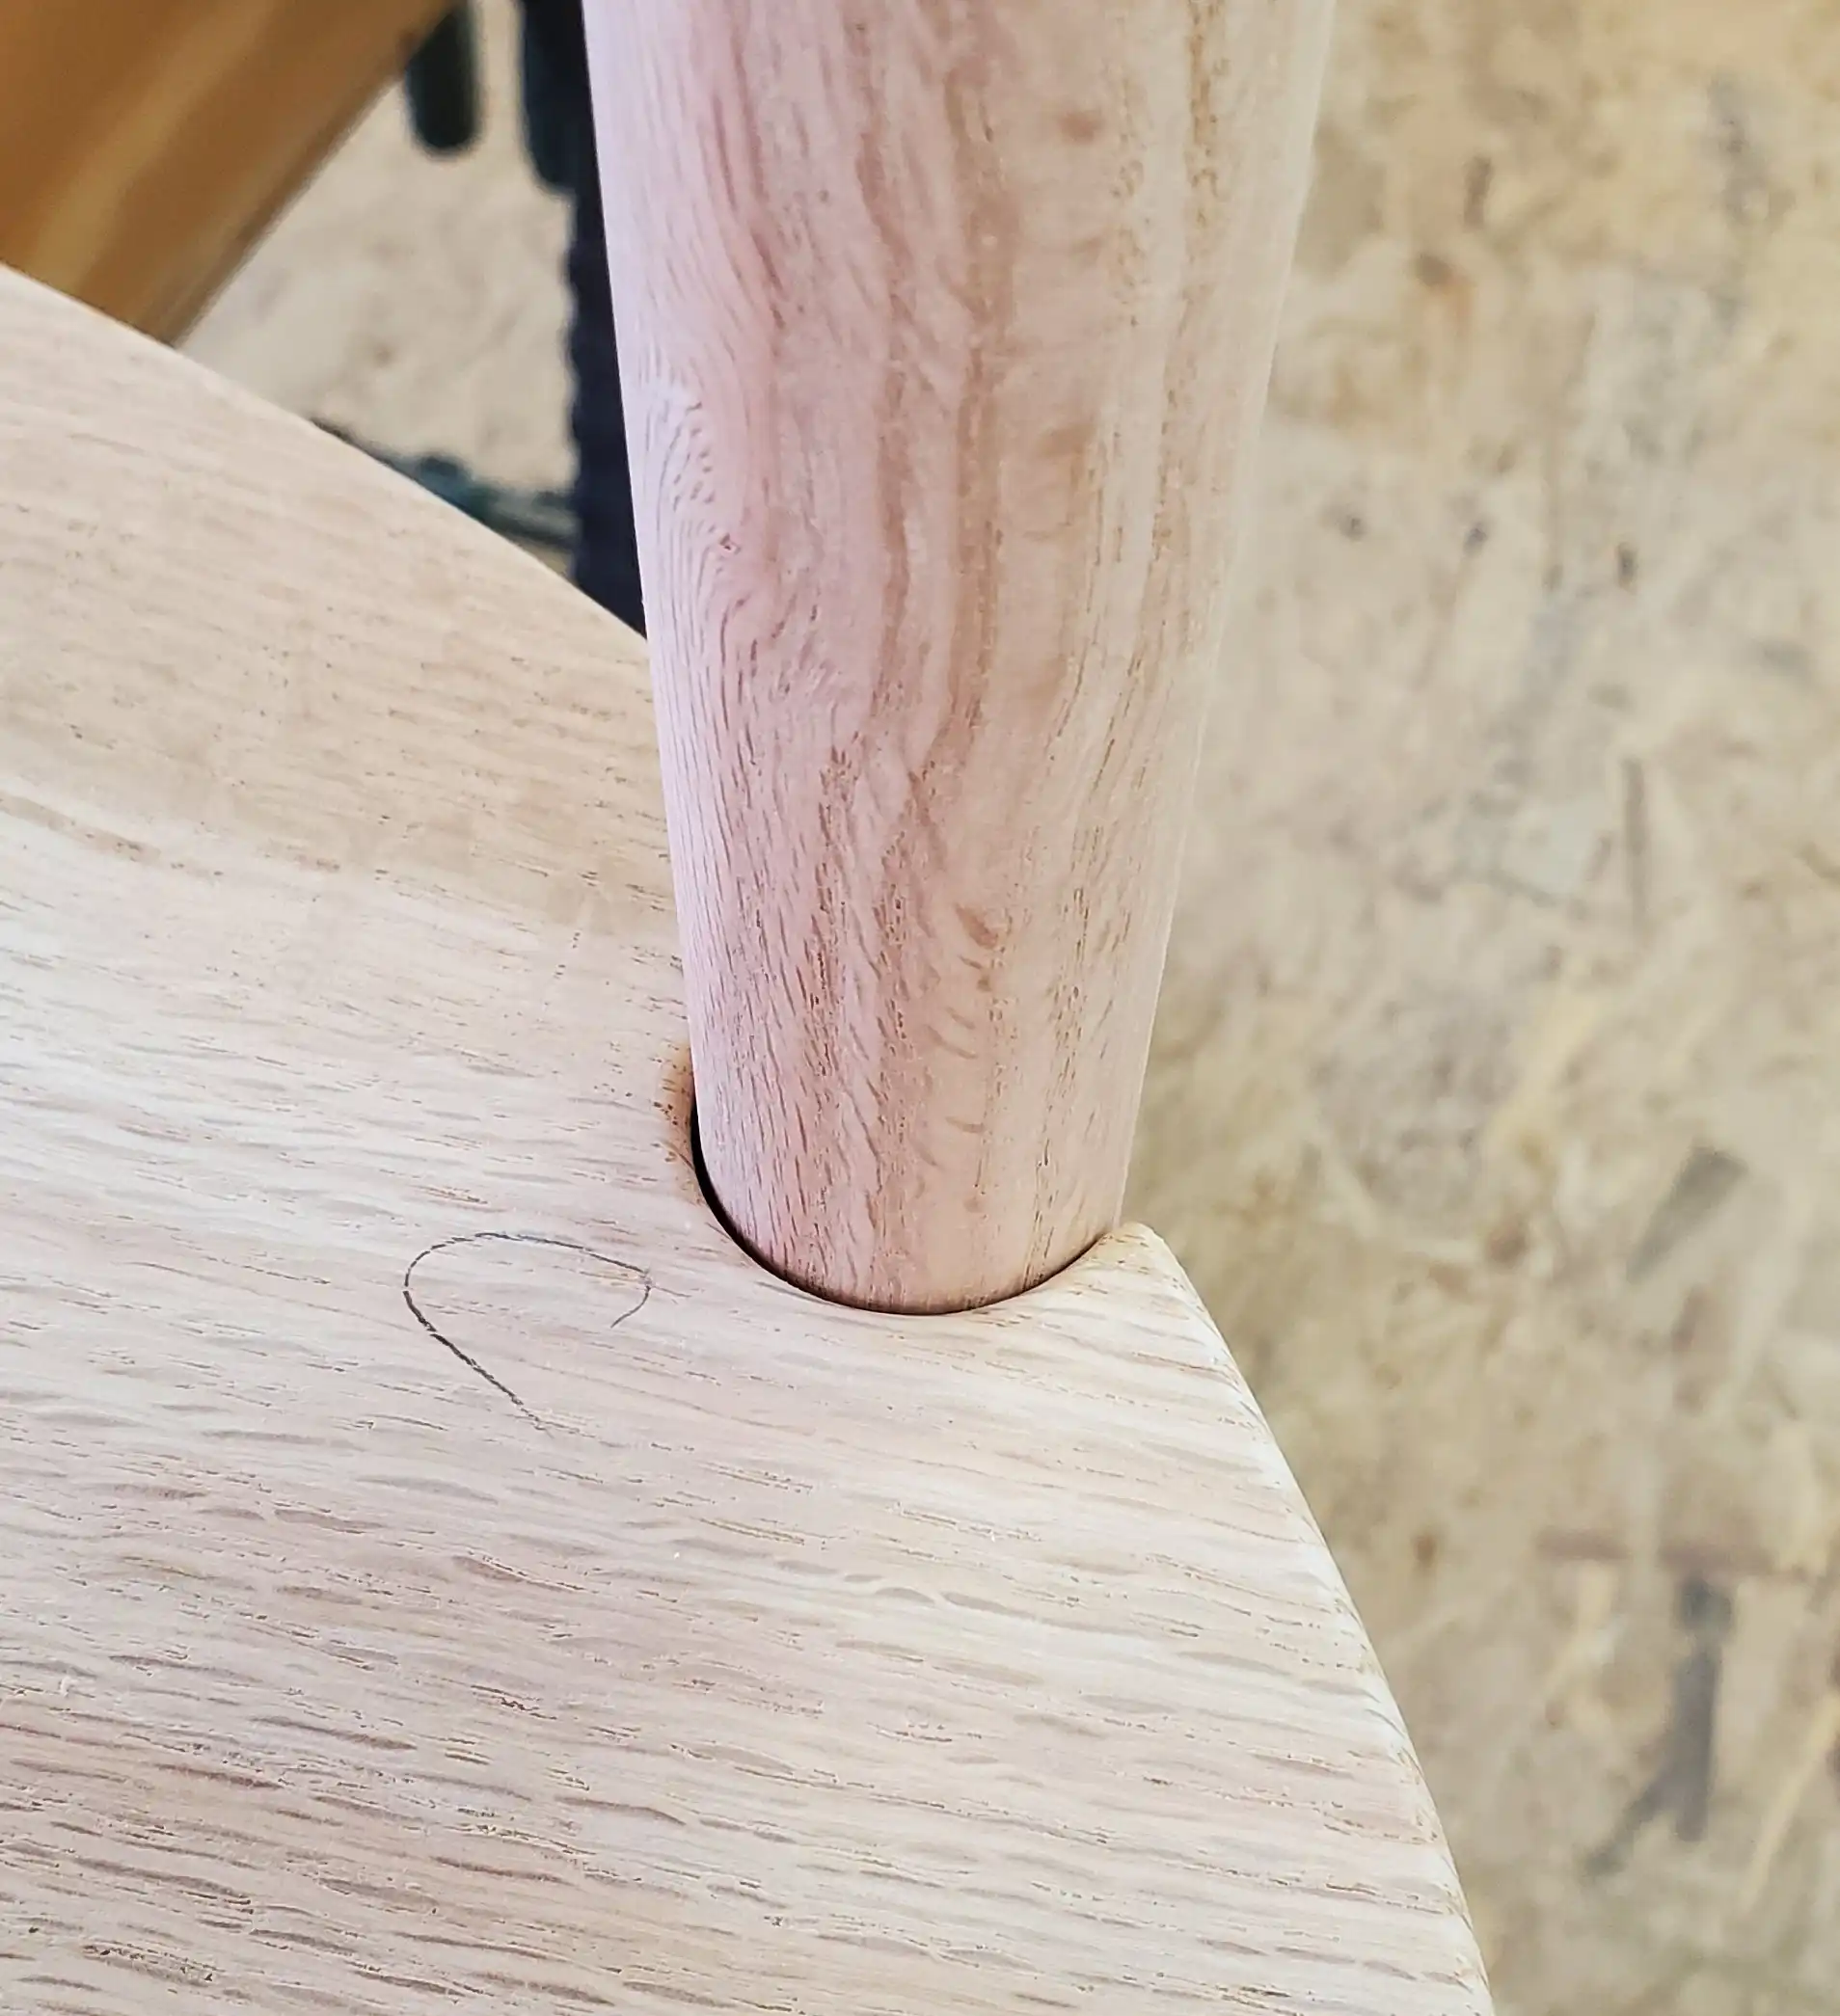
Finally, we can glue everything together to make a final table! Glue is applied to the dowels and the legs are clamped into place. Then the bottom shelf was dropped in and screws were driven from underneath the shelf to lock the legs into place. These screw holes were then filled with a colored filler (similar to hot-glue).
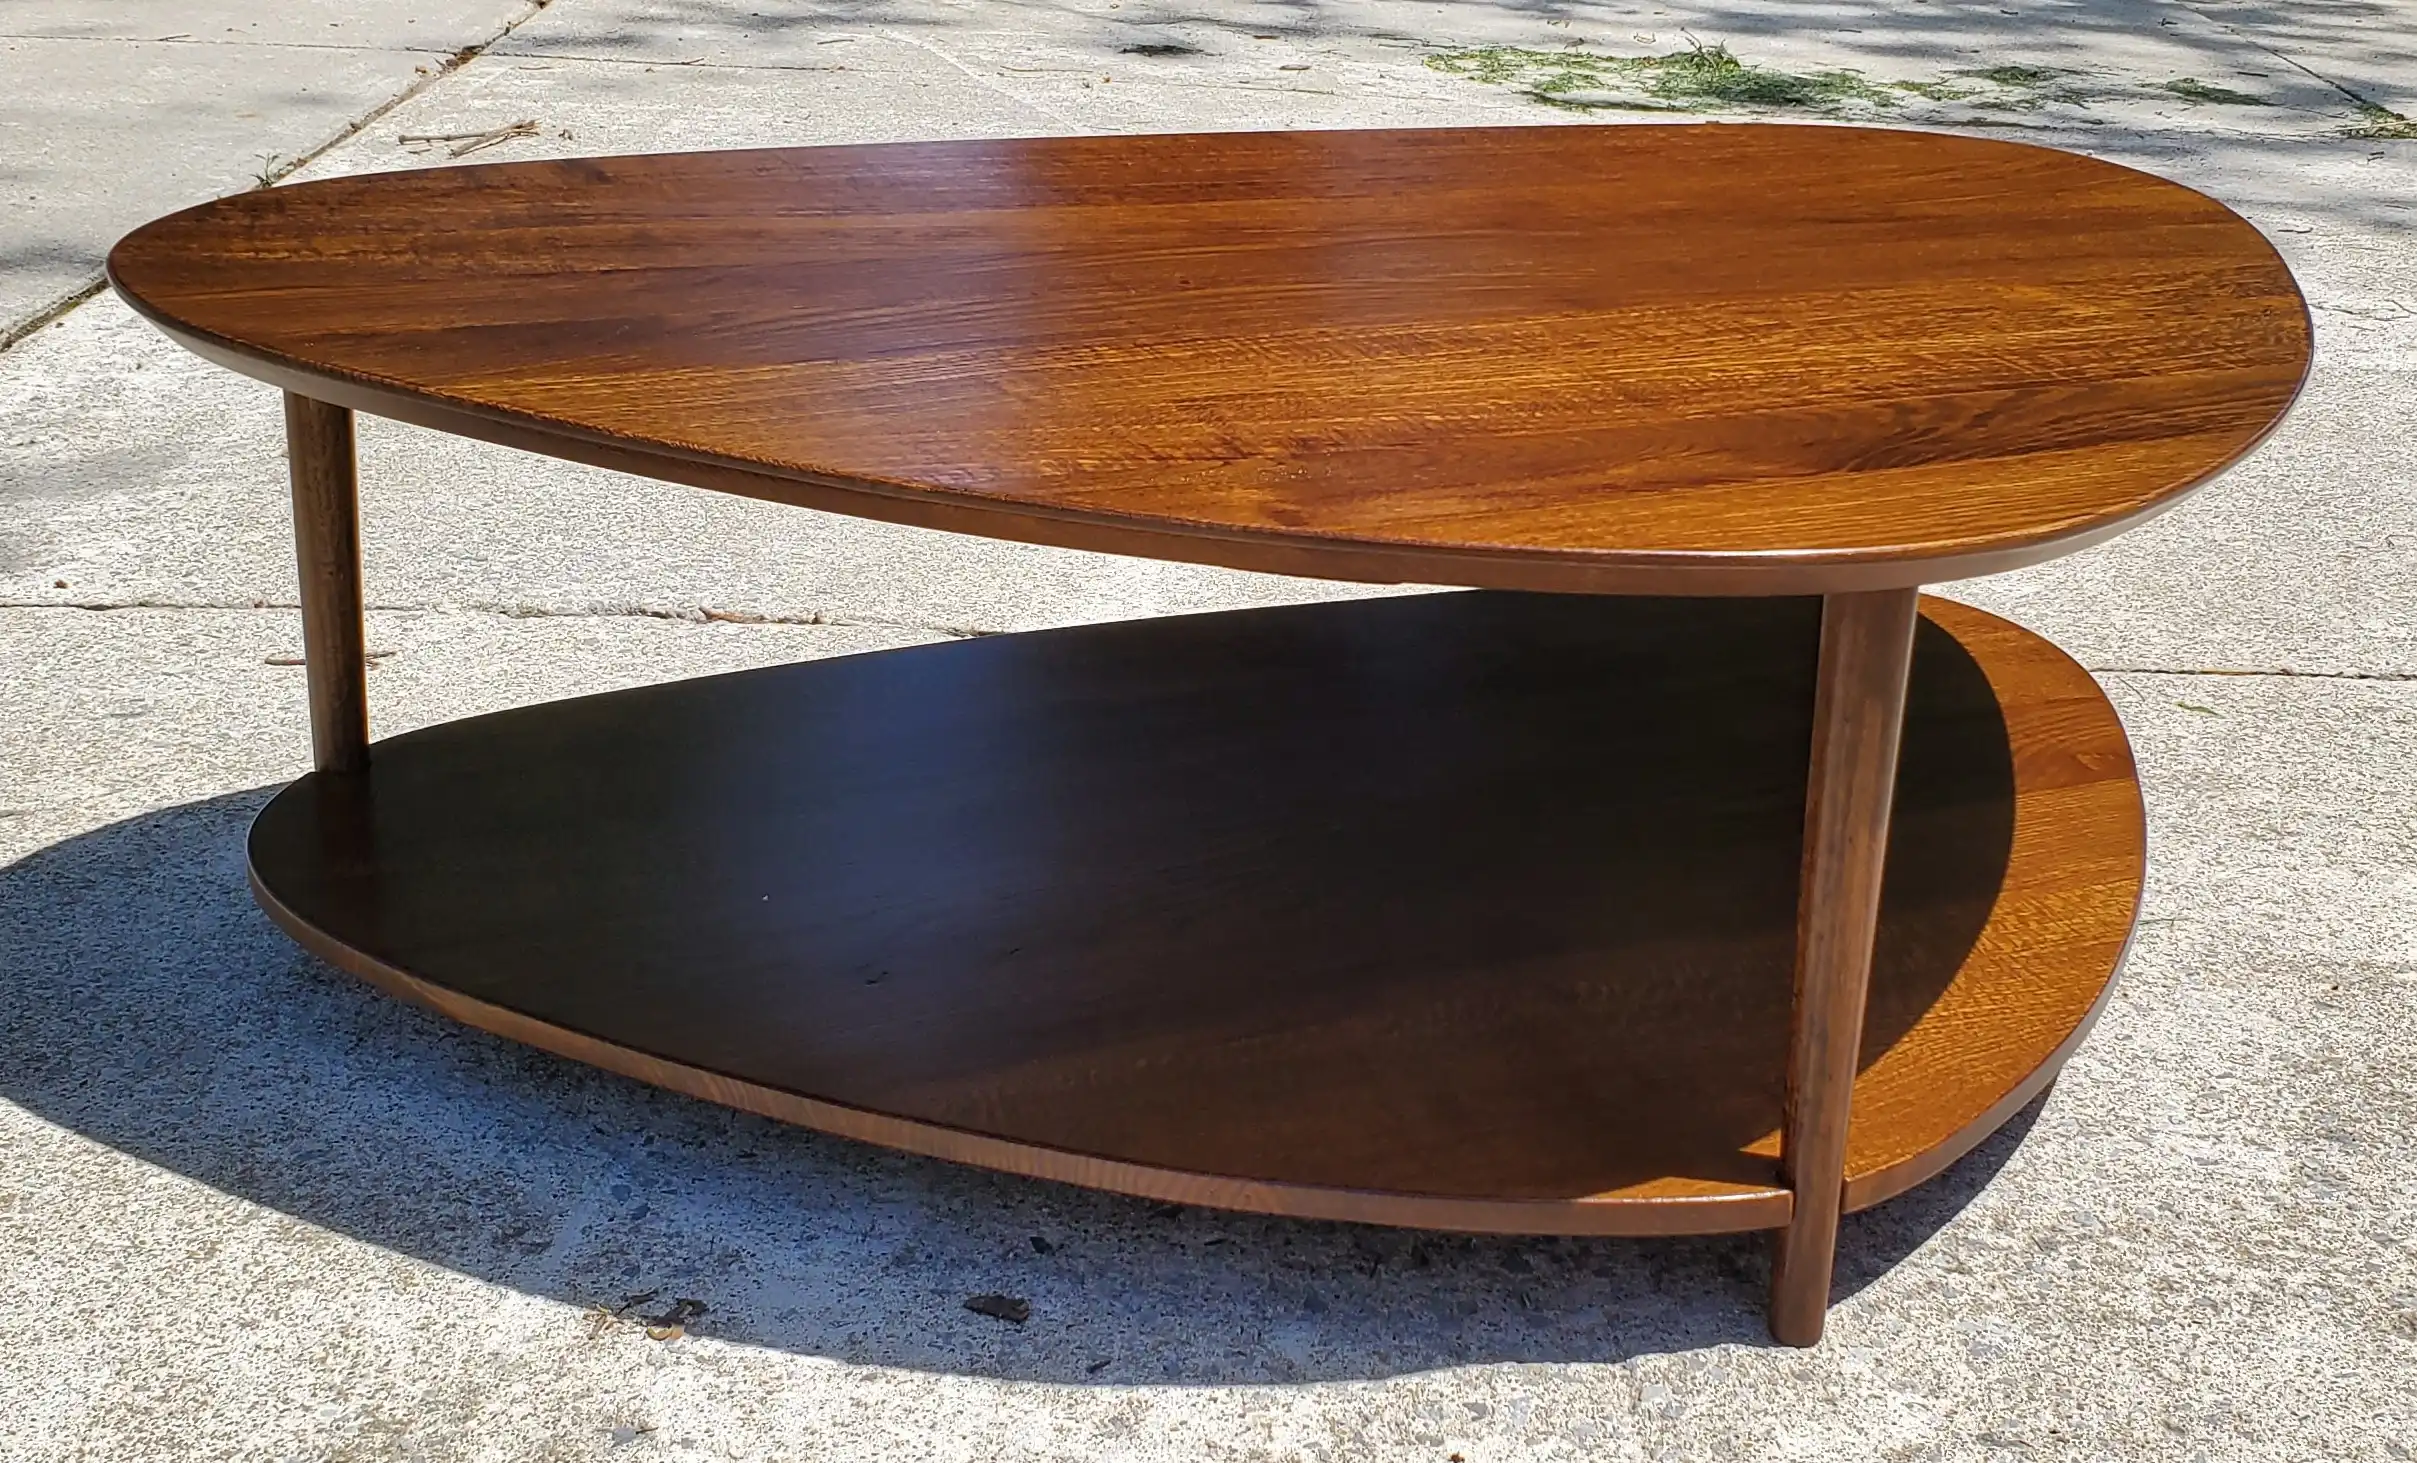
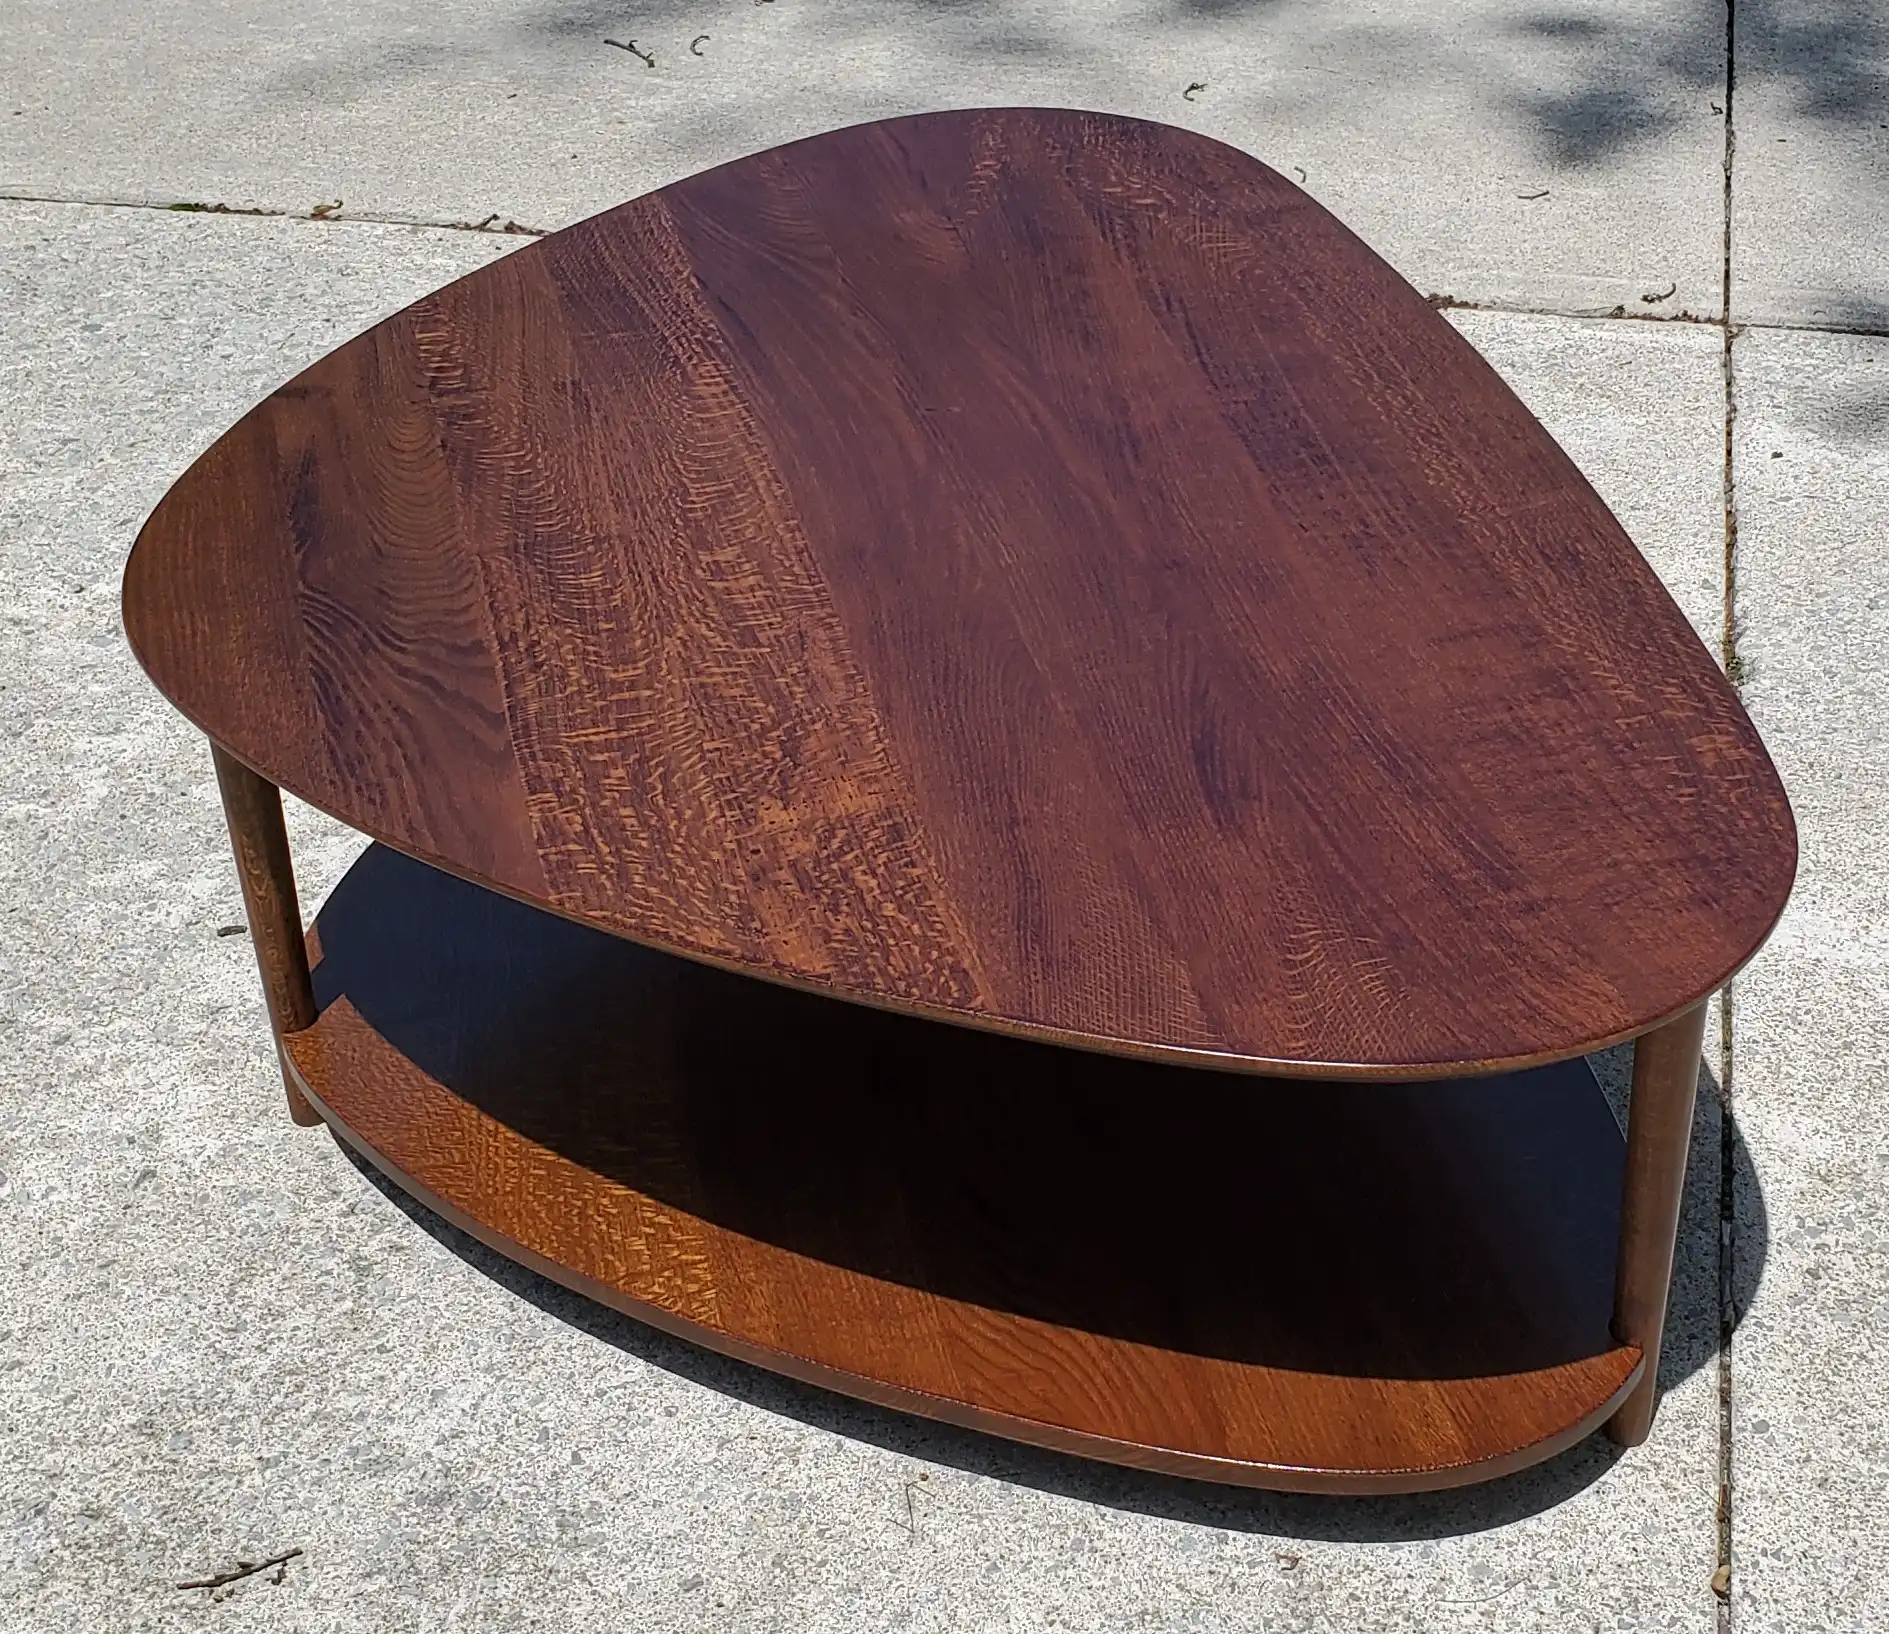
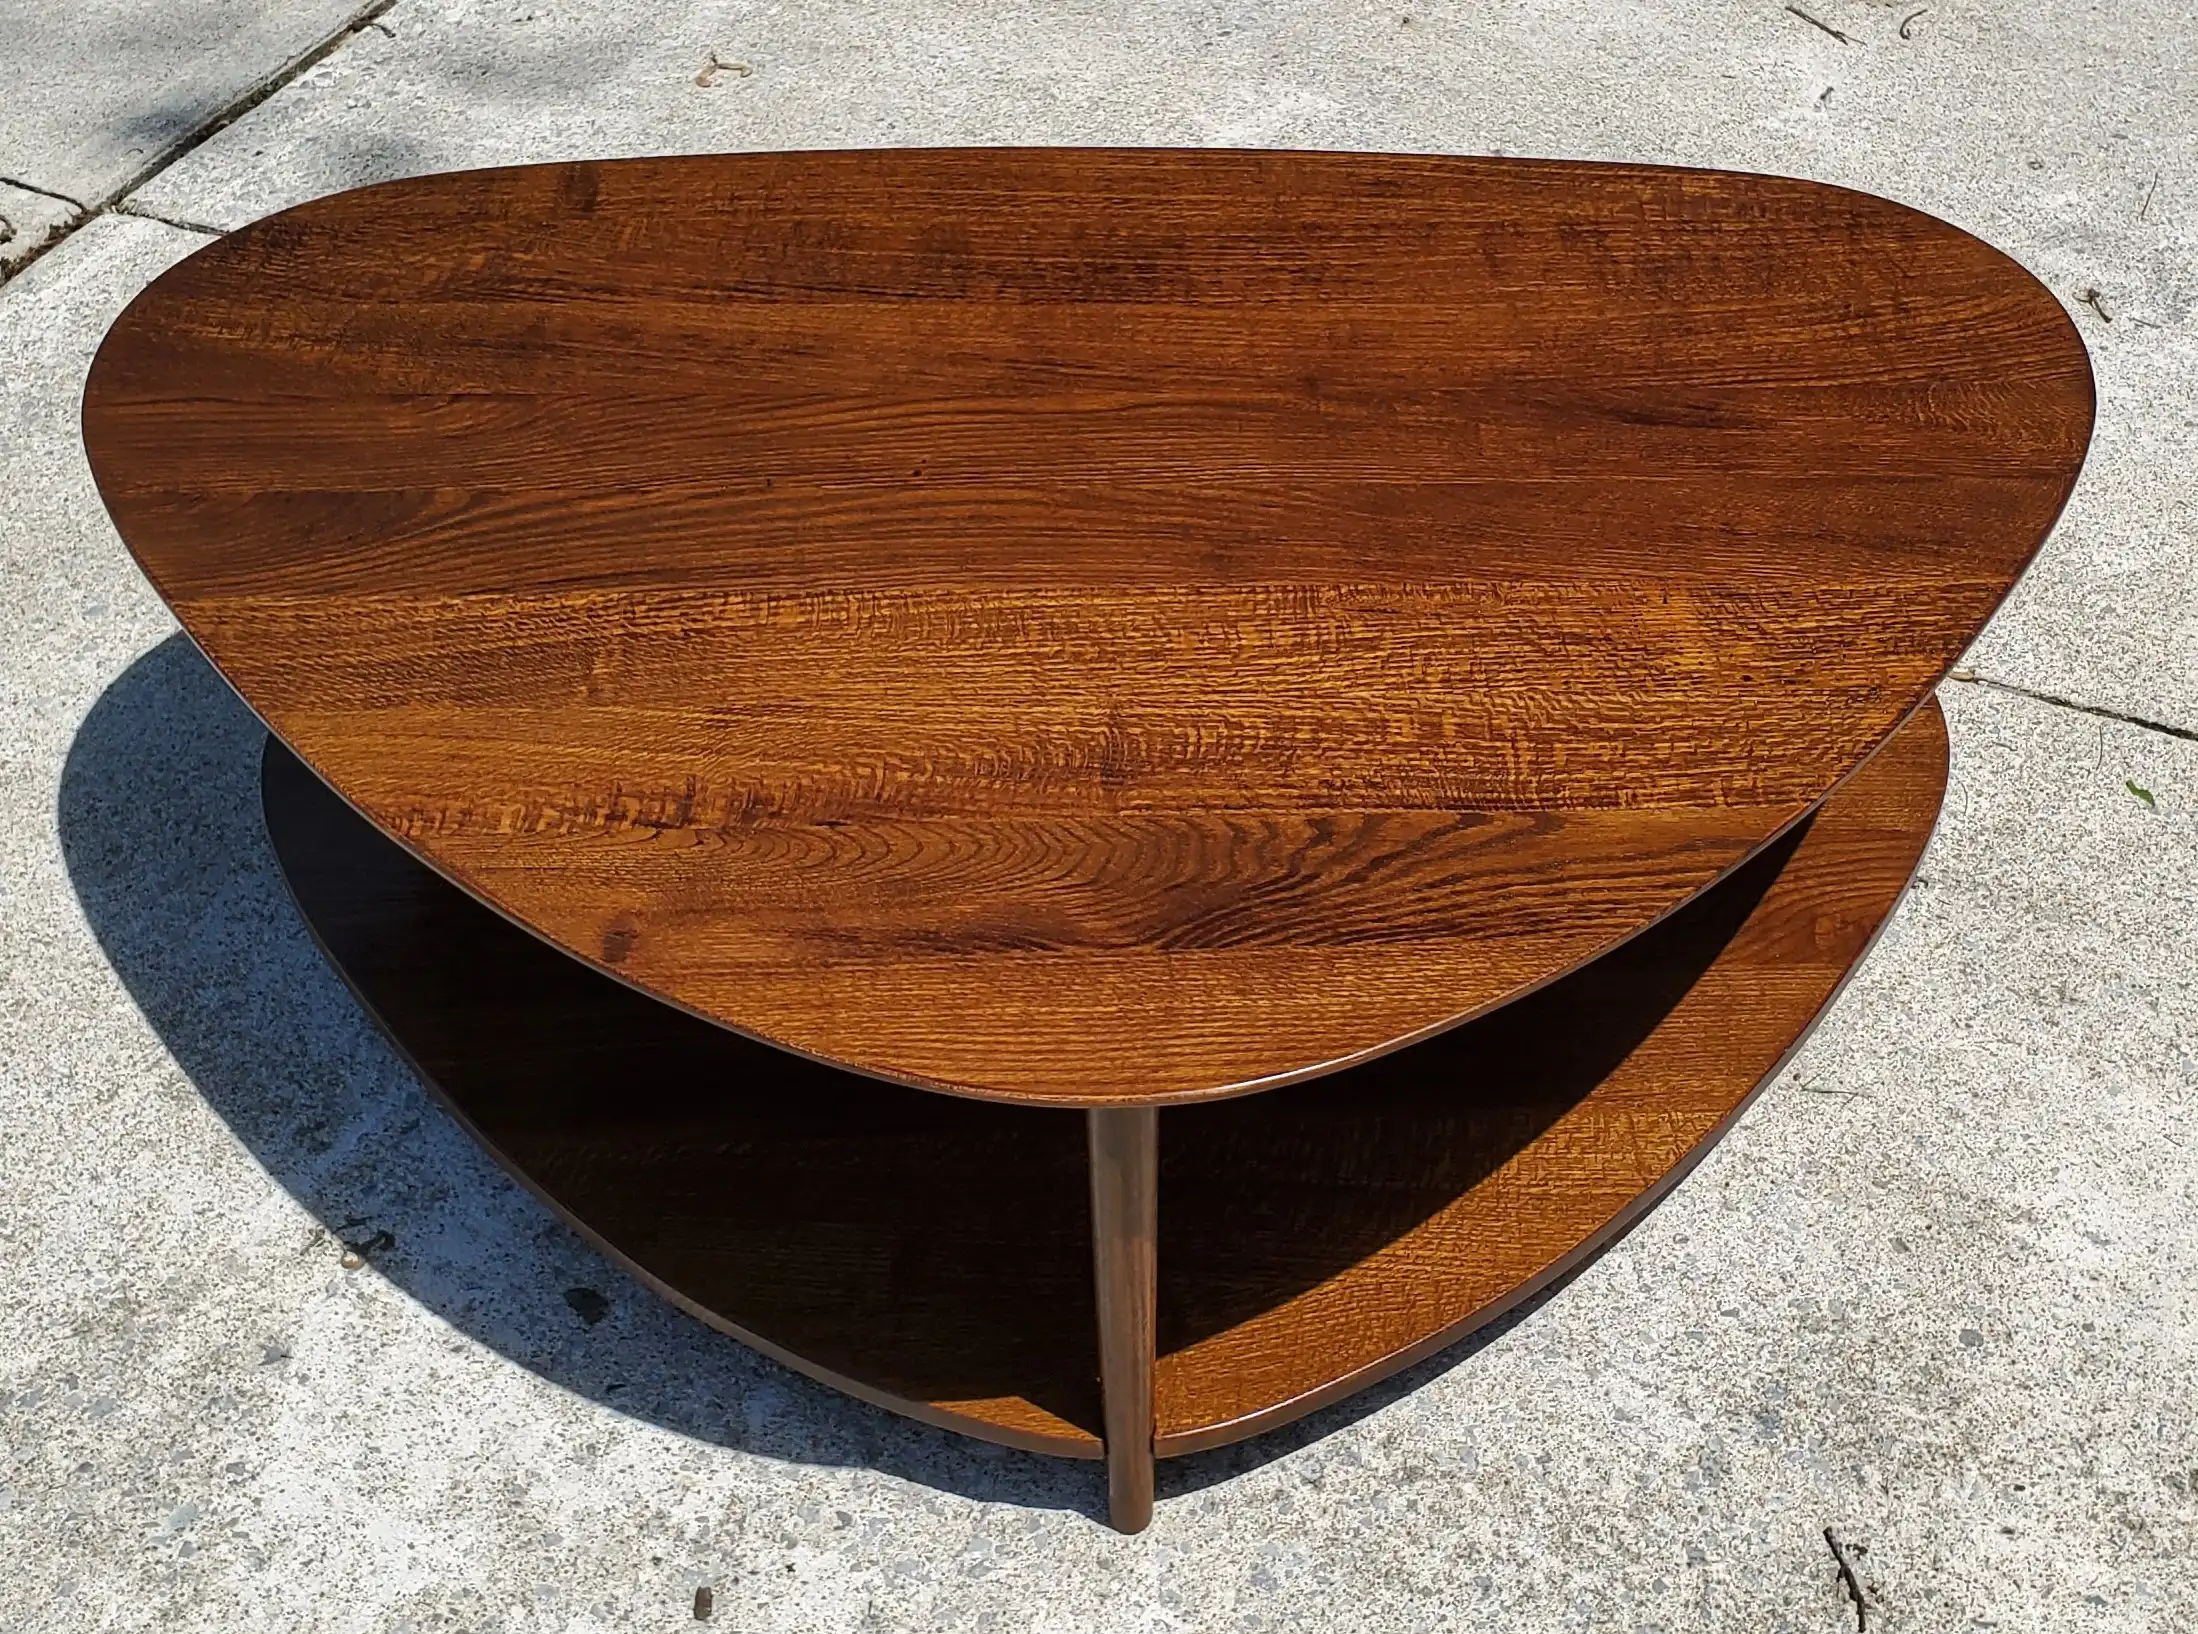
A few final photographs!